Okta OIDC Setup
These instructions create a custom Okta OIDC Web App and connect it to Rollbar OIDC SSO.
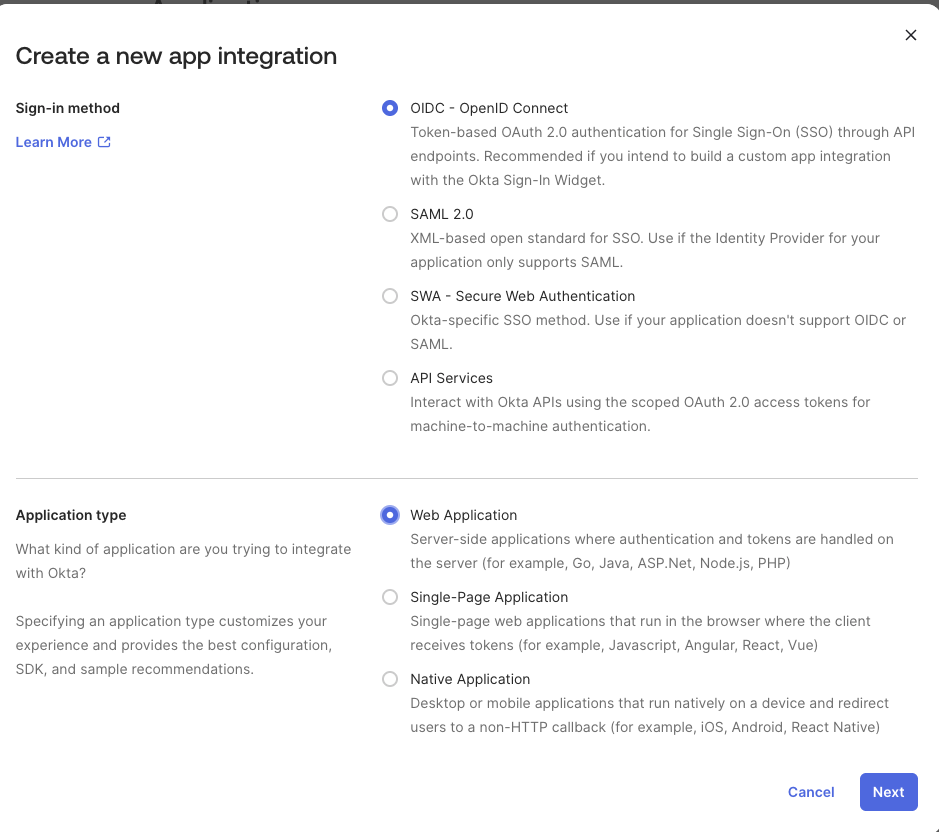
1. Create the Okta OIDC app
- In Okta Admin Console, go to:
Applications → Applications - Click Create App Integration
- Select:
- Sign-in method: OIDC - OpenID Connect
- Application type: Web Application
- Click Next
2. Configure the Okta app settings
General Settings
- App integration name:
Rollbar OIDC(or similar)
Grant type
Enable:
- Authorization Code
- Refresh Token
Do not enable:
- Client Credentials (not needed)
- Wildcard redirect URIs (do not use)
Sign-in redirect URIs
Set the redirect URI to Rollbar’s OIDC callback:
https://app.rollbar.com/auth/callback/oidc
Remove any default localhost callback URL.
Sign-out redirect URIs (optional)
Not required for Rollbar. If you want a clean configuration, set:
https://app.rollbar.com/
Trusted Origins / Base URIs
Leave blank.
Click Save.
3. Copy Client ID and Client Secret from Okta
- Open the app (Rollbar OIDC)
- Go to the General tab
- In Client Credentials, copy:
- Client ID
- In Client Secrets, reveal/copy:
- Client Secret
You will paste these into Rollbar.
5. Get your Okta OIDC Discovery URL
The discovery URL is an Okta endpoint. Use the correct format based on your Okta authorization server.
Option A: Org Authorization Server
Use this if you are using the Okta org issuer:
https://{yourOktaDomain}/.well-known/openid-configuration
Option B: Custom Authorization Server (most common: default)
default)Use this if you use Okta’s custom authorization server (often named default):
https://{yourOktaDomain}/oauth2/{authServerId}/.well-known/openid-configuration
Most commonly:
https://{yourOktaDomain}/oauth2/default/.well-known/openid-configuration
How to confirm which one you’re using:
- Okta Admin → Security → API → Authorization Servers
- If you use a server like
default, use Option B.
- If you use a server like
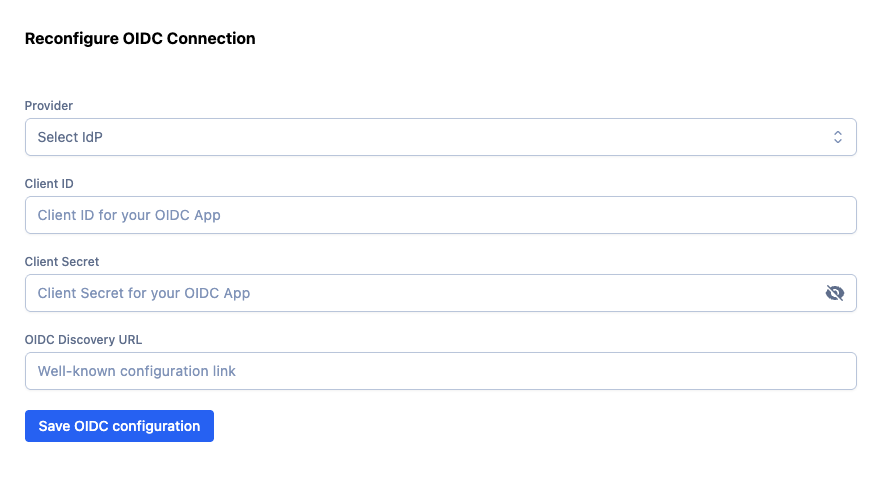
6. Configure Rollbar to use Okta OIDC
In Rollbar:
- Go to Account Settings → Identity Provider (or SSO settings)
- Under OIDC configuration, enter:
- Client ID: (from Okta)
- Client Secret: (from Okta)
- OIDC Discovery URL: (from Step 5)
- Save
7. Add users to Rollbar (important)
Okta authentication does not automatically grant Rollbar access.
Ensure you user is added to the team or add the new user.
- In Rollbar, go to Account Settings → Users/Team
- Invite the user(s) you assigned in Okta (or ensure they already exist in the Rollbar account)
- Have them accept the invite if required
8. Test the login
Preferred test flow (SP-initiated):
- Go to:
https://app.rollbar.com/login/{your_rollbar_account_slug} - Click Log in with OIDC Identity Provider
- Authenticate in Okta
- Confirm you land in the correct Rollbar account
If you see "Access needed: contact your admin":
- The user authenticated successfully, but is not a member of that Rollbar account yet.
- Fix by inviting them in Rollbar (Step 7).