Avoiding billing surprises
Rollbar provides tools to manage billing and avoid surprises by setting up usage alerts, configuring overage options, and establishing rate limits, allowing users to receive notifications via email or Slack and control how occurrences are processed when limits are reached. Here are a few suggested steps you can take to ensure you don't get any surprises.
Get usage alerts
Rollbar automatically emails your account Owners whenever your current usage reaches set thresholds. These notifications will be sent when your account reaches 80%, 90%, 95%, and 100% of your occurrence limits. The alerts will be sent with the subject line of Your account has used X% of its occurrence limit to help you identify these alerts more easily.
Set up additional usage alerts
We also offer the ability to send the same notifications to emails who are not part of the Owners team. For example, if you want these notifications sent to a department lead or finance department. They would not need a Rollbar user created, and can instead get these notifications directly. Here's how you set it up:
Configure additional emails
- Navigate to your Usage page by clicking on your user icon in the bottom left, then clicking on the
Usagemenu option
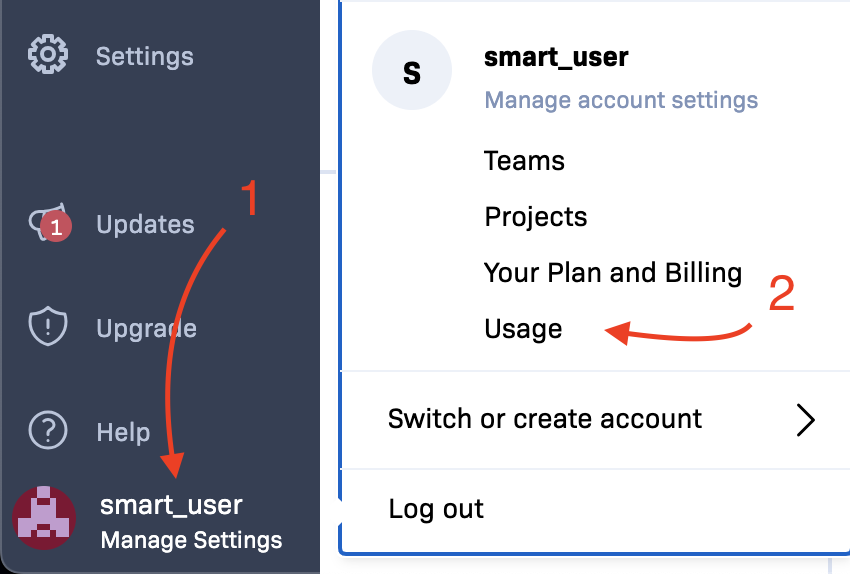
- Click on the
Notificationsbutton at the top right of the Usage page.

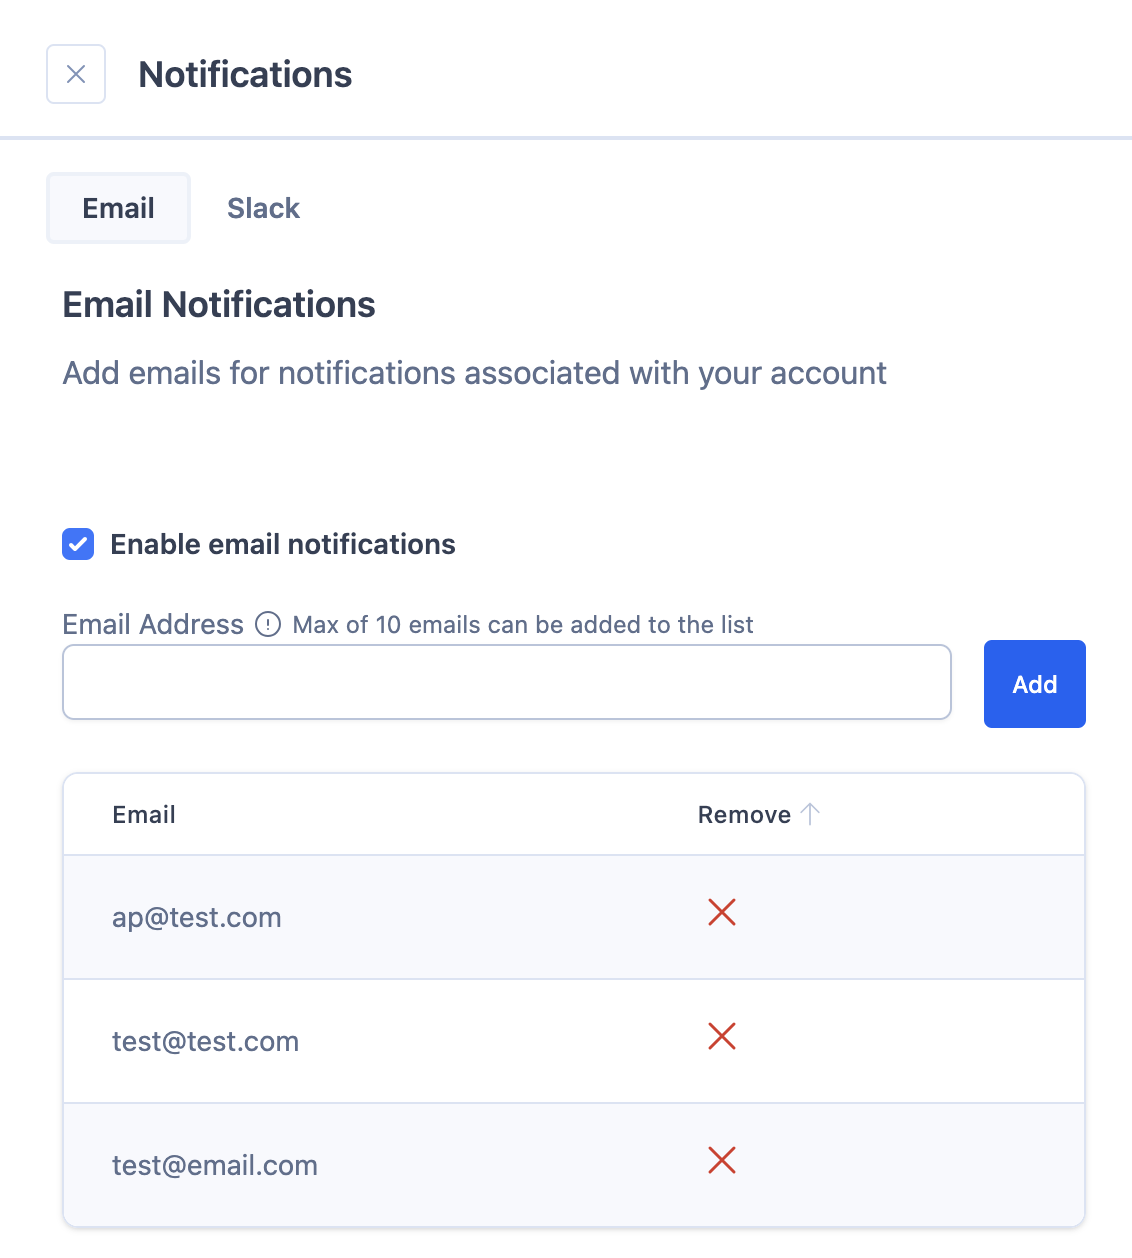
- A modal will appear which will allow you to add enable the additional notifications.
- You can then add up to 10 emails to get these usage notifications.
Configure additional Slack alerts
You would need Slack connected in order to receive these alerts. If you have not set up Slack, refer to the guide here.
- Navigate to your Usage page by clicking on your user icon in the bottom left, then clicking on the
Usagemenu option

- Click on the
Notificationsbutton at the top right of the Usage page.

- A modal will appear which will allow you to add enable the additional notifications.
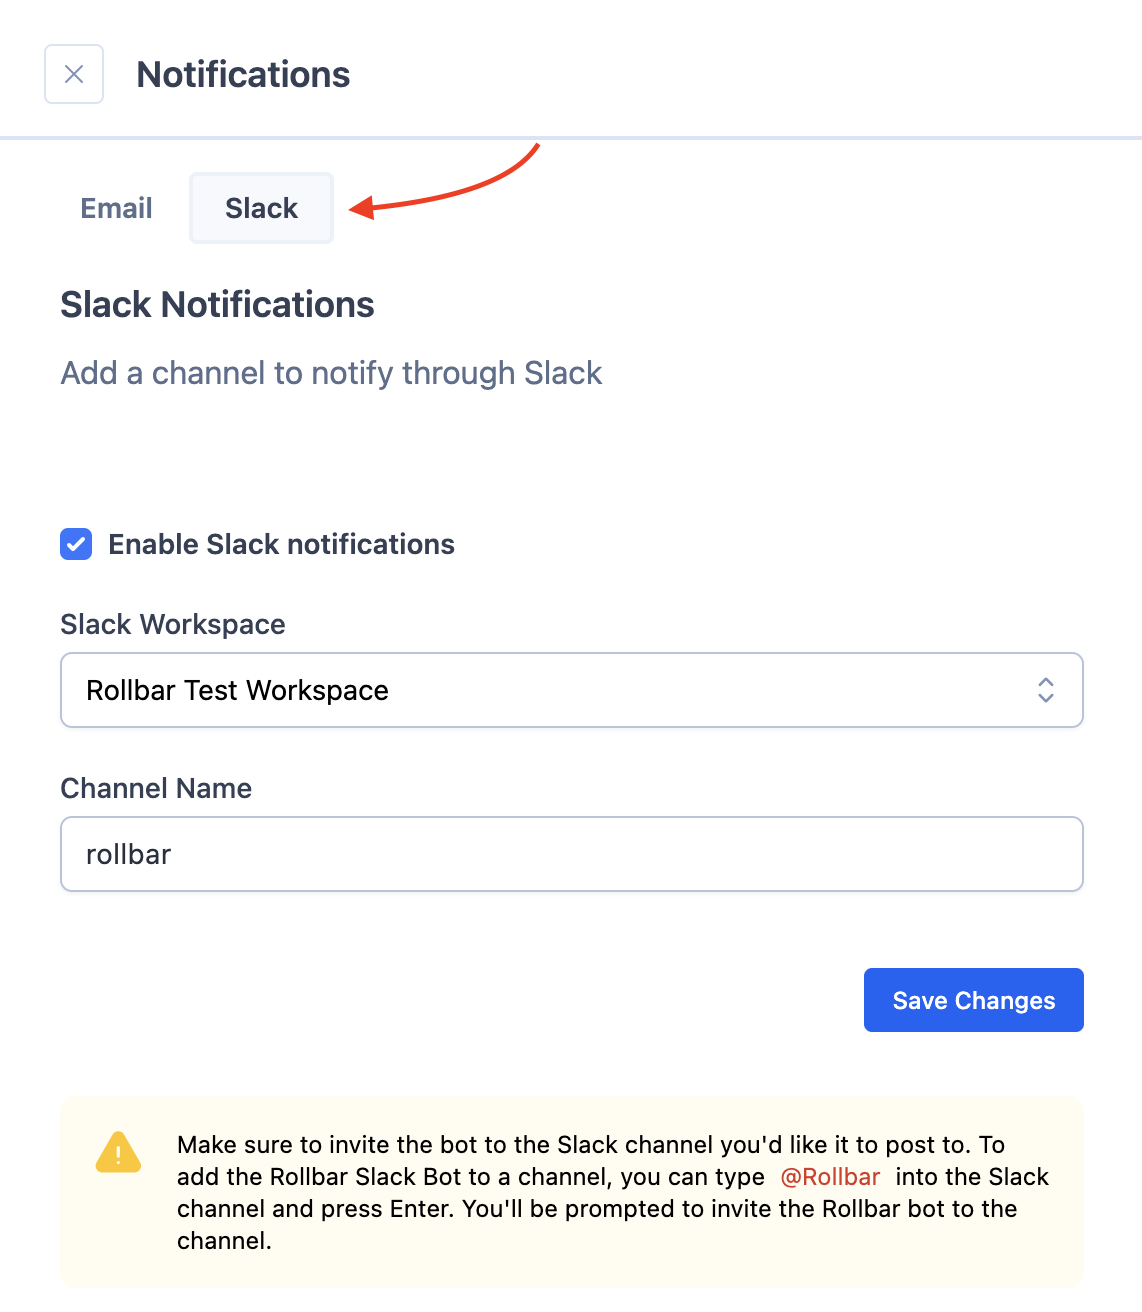
- Click on the
Slackselector at the top of the modal. - You can now Enable the Slack notifications and specify the channel where you would want to receive the notifications.
Configure overage options
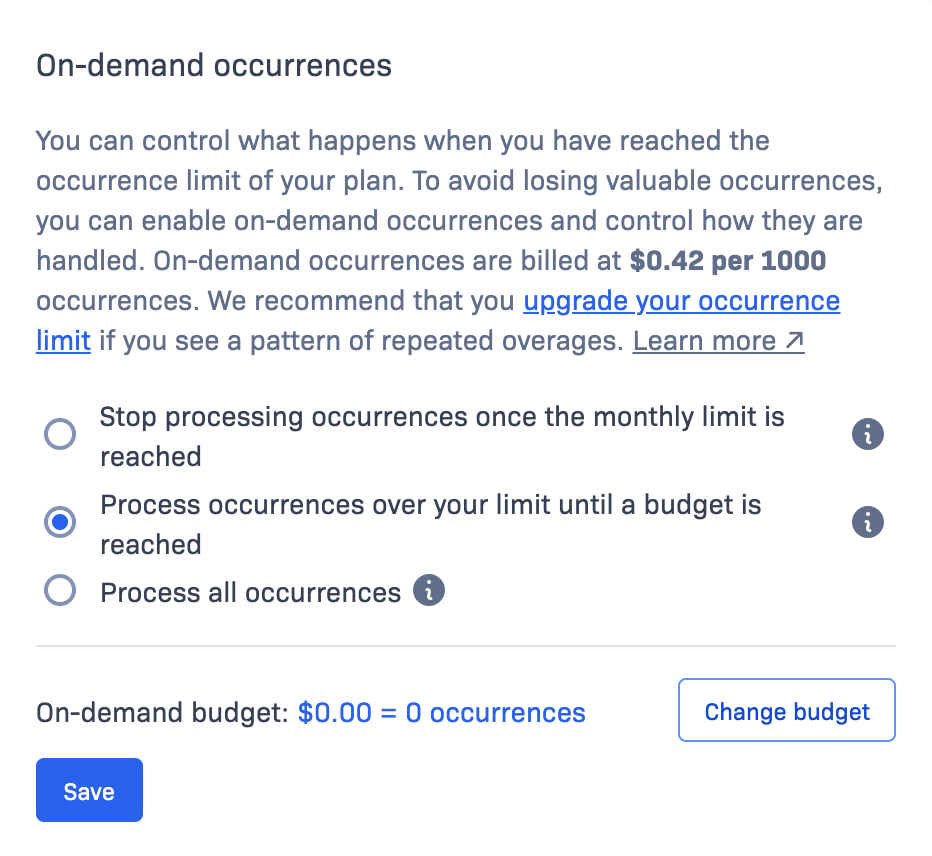
You can control what happens when you have reached the occurrence limit of your plan. To avoid losing valuable occurrences, you can enable on-demand occurrences and control how they are handled. Rollbar offers three different types of overage behaviors:
- Process all occurrences: This will allow Rollbar to process any occurrence when your quota is completely utilized. The pricing of additional occurrences depends upon your plan; and, this information will be displayed on this section.
- Process occurrences over your limit until a budget is reached: You can configure a set dollar amount for Rollbar to process in excess of your plan limit. Once the additional number of occurrences are used, Rollbar would then stop processing new occurrences until your plan resets. The pricing of additional occurrences depends upon your plan; and, this information will be displayed on this section. We do suggest setting a budget of 2X your plan's monthly cost to ensure you’re fully covered without surprises.
- Stop processing occurrences once the monthly limit is reached: Rollbar will not process any occurrences once you have hit your quota limit. Please be aware, you can lose valuable error information if your Rollbar account stops processing new data.
Here is how you can configure your overage options:
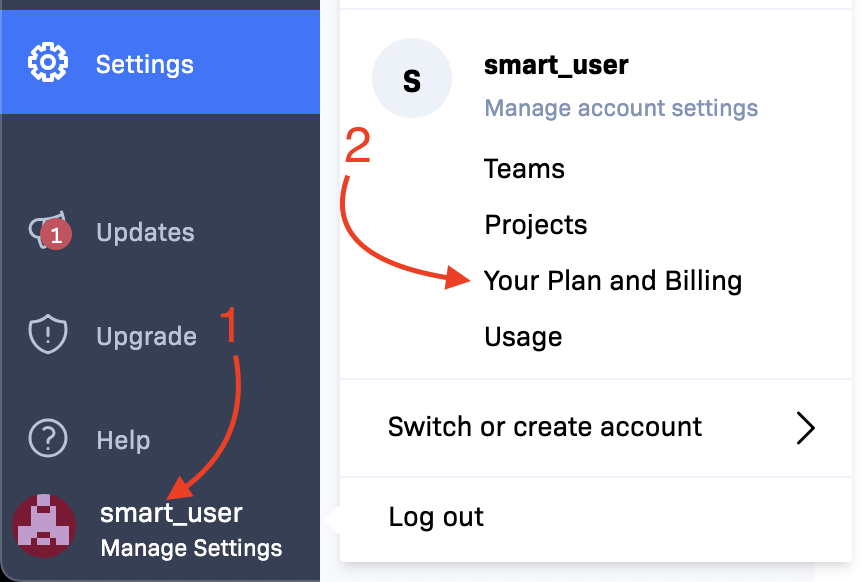
- Navigate to your plan page by clicking on your user icon in the bottom left, then clicking on the
Your Plan and Billingmenu option
- You will see an
On-demand occurrencessection displaying your current settings. - Select whichever option suits your needs.
- If you select
Process occurrences over your limit until a budget is reachedyou can click on theChange budgetbutton to set the additional budget allocation for your plan.
- If you select
Configure rate limits
Please be aware that Rate Limits can reduce visibility into your errors
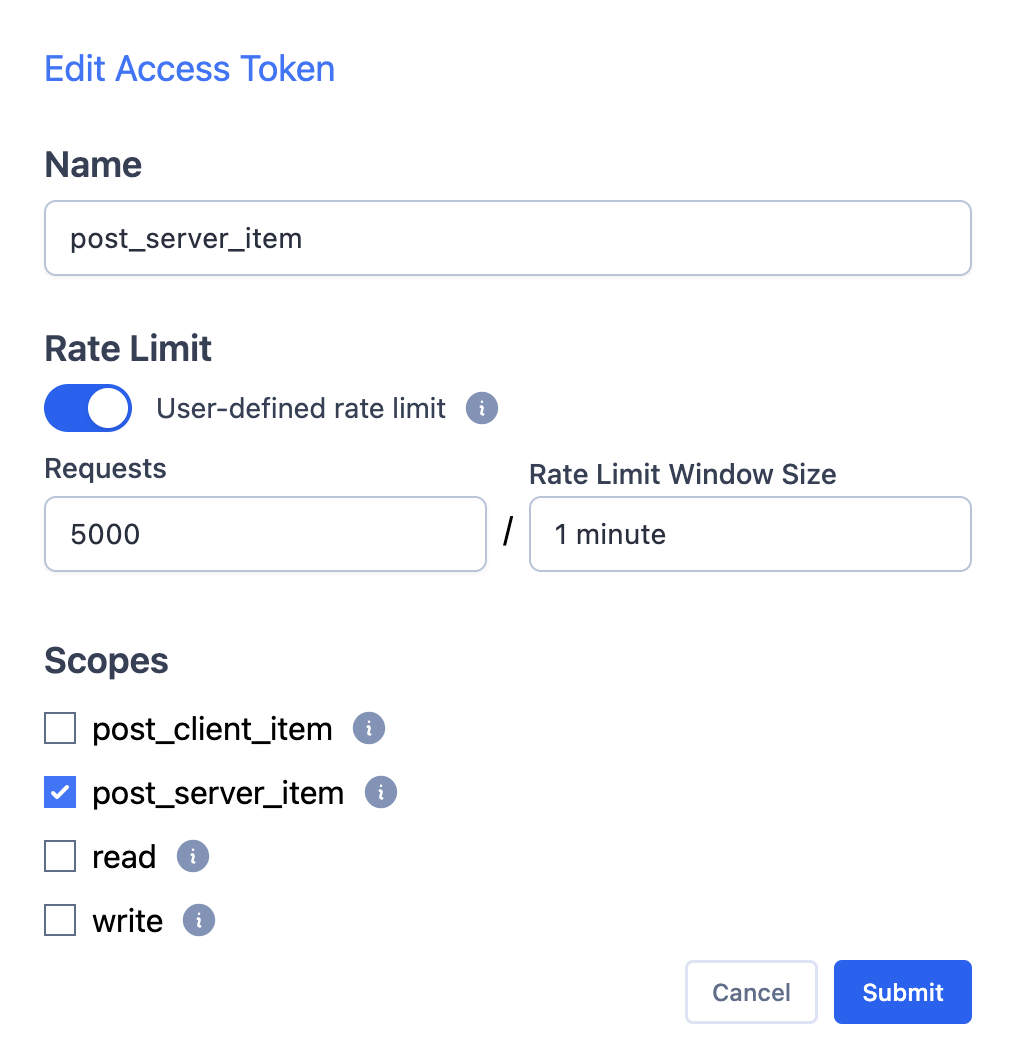
Rate limits allow you to configure the number of occurrences Rollbar can process. Refer to our rate limit documentation here for full details about this feature. Rate limits can be set on a per-project scale. For example, you can set a rate limit one project while still allowing your other projects to fully capture your data. Here is how you configure rate limits:
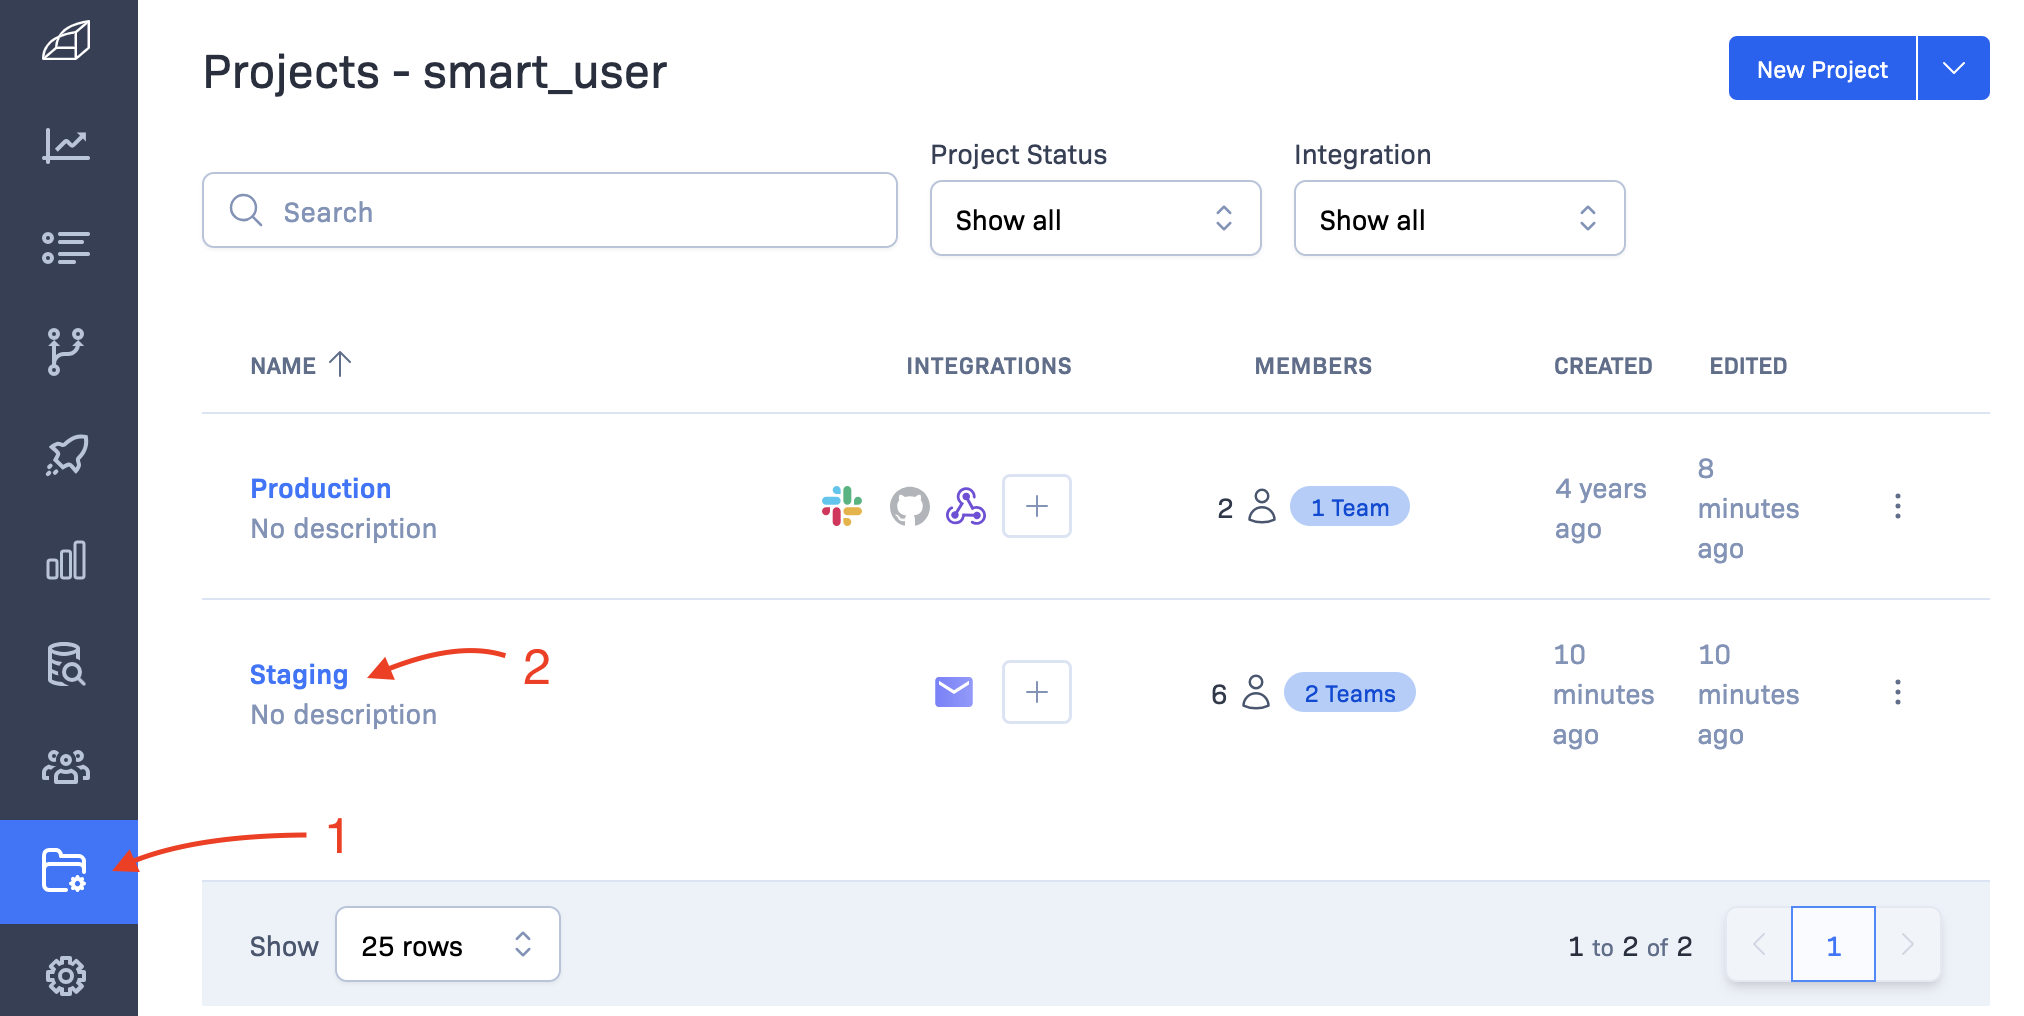
- Click on the
Projectstab in the sidebar - Click on the project name of the project you wish to edit
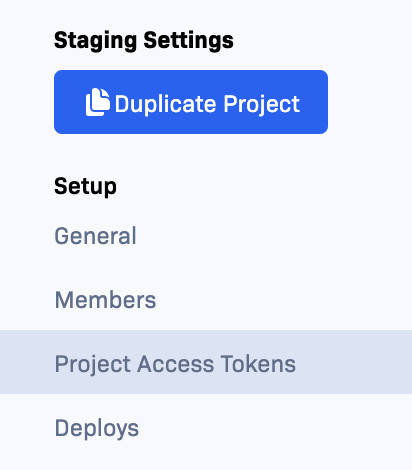
- Click on the
Project Access Tokensmenu option
-
Click on the
⋮menu on the rightmost column of the token you want to modify.-
In most cases this is the
post_server_itemorpost_client_itemtoken.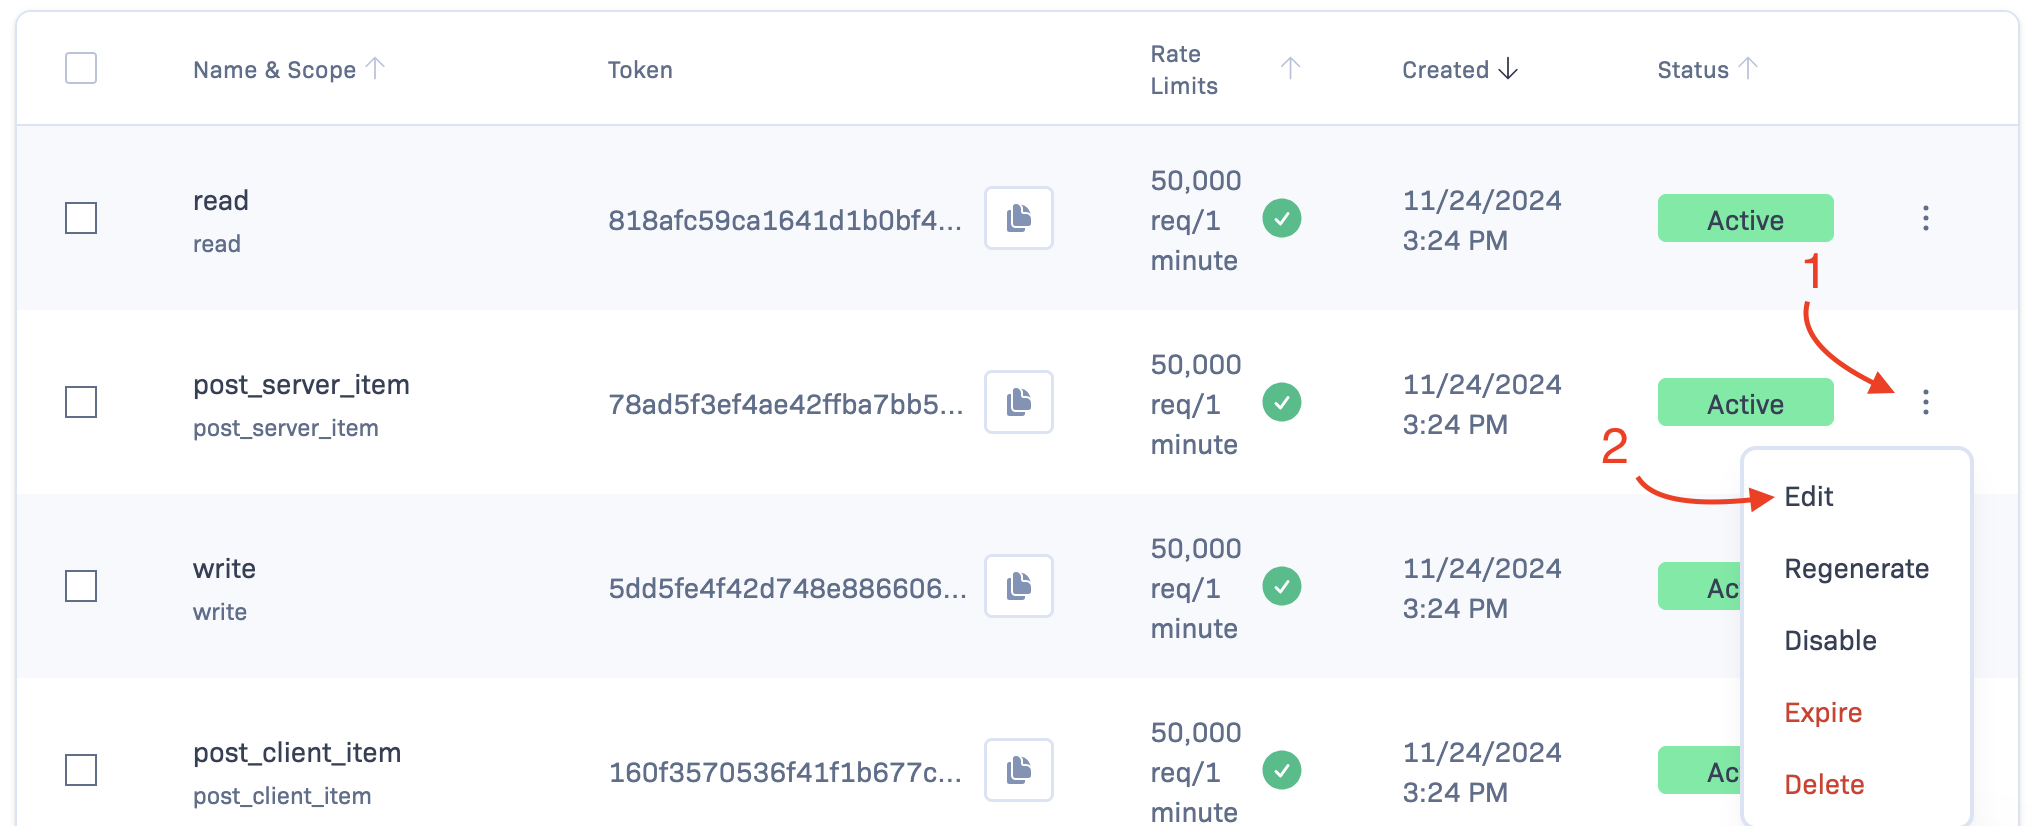
-
-
A modal will appear which will allow you to set custom rate limits for the token.
-
Set the limits in the
RequestsandRate Limit Window Sizefor whatever is necessary in your situation. -
Click the
Submitbutton.
Updated about 1 year ago