Using Zapier to create Zendesk tickets
Why use webhooks?
Webhooks are a powerful tool to receive information from Rollbar and use in any other workflows you have. These will trigger on conditions you set and contain information about the Rollbar item. More information on webhook configuration and information can be found here.
What can we do with webhooks?
Here’s one example utilizing Rollbar webhooks and Zapier. Zapier is a tool which can "catch" the webhook, process it, and forward it to other tools you’re using (called Zaps). The following will need a paid subscription to Zapier. For this demonstration, we will use both webhooks and our people tracking features.
Suppose you have high priority clientele and need to ensure they have a smooth experience on your application. If they encounter an error you want to triage that immediately and inform your customer success team. As an example, let’s create a ticket in Zendesk for your team to follow up.
Don't have time to read? Watch our short video on how you can setup Zapier to create Zendesk tickets:
Create a Zendesk ticket automatically using Rollbar webhooks
First, copy this Zap to your own Zapier account: https://zapier.com/shared/c2afe0eba9c4e8a565227315ac4831d2db905580
You’ll see a screen which contains the Zapier webhook URL. Copy this URL and we shall use it when creating the Rollbar webhook:
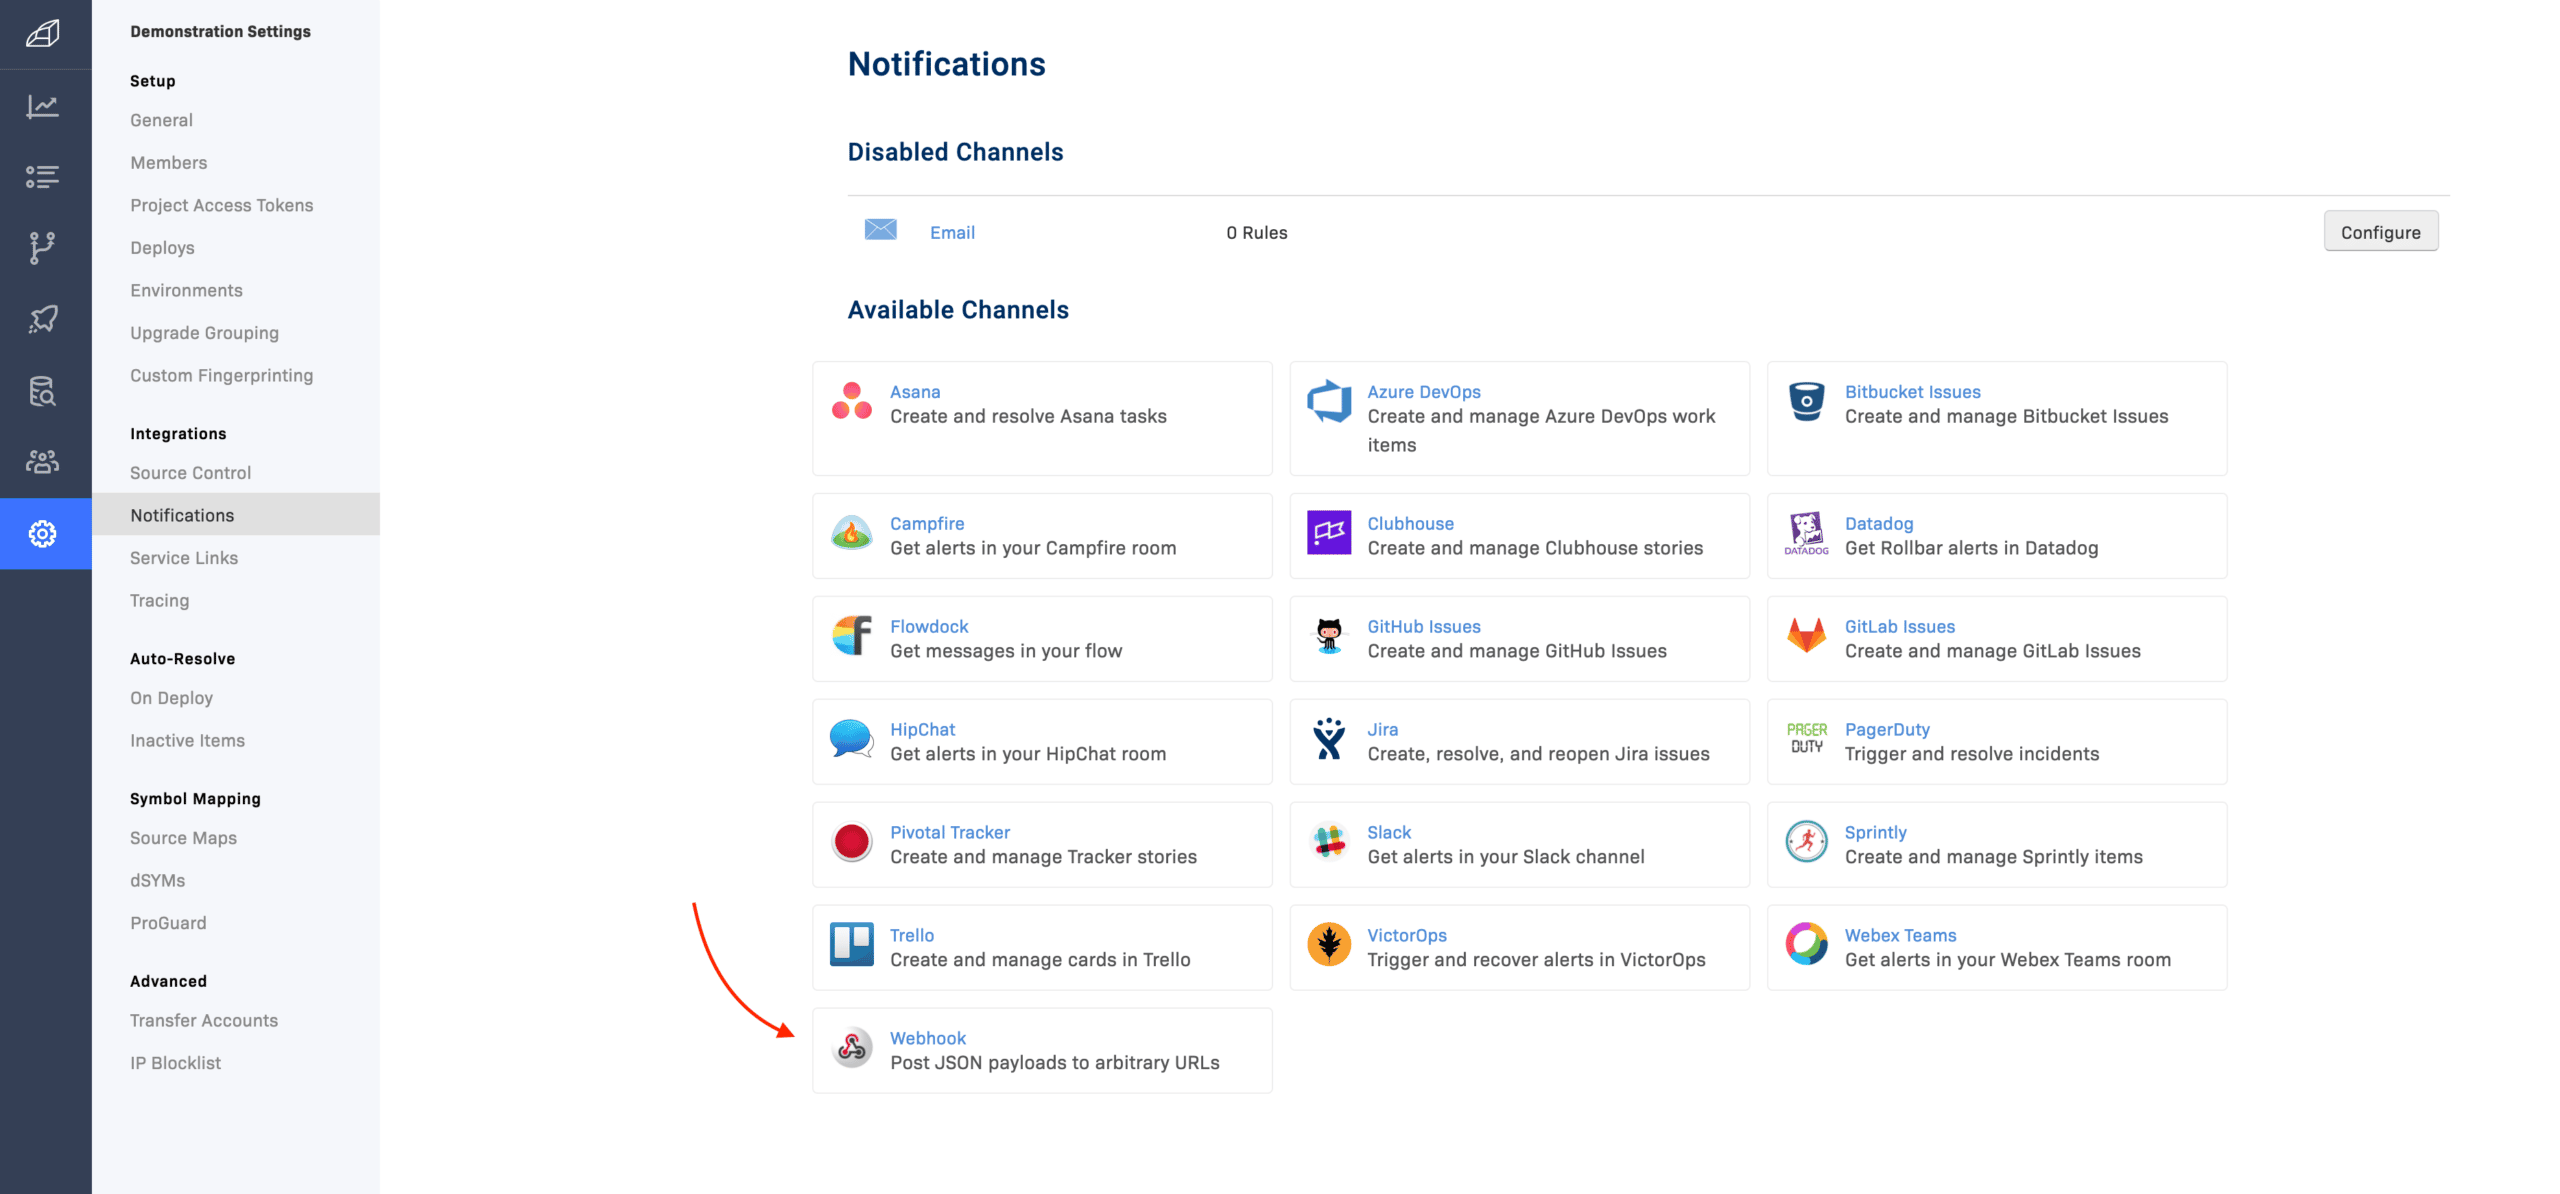
 We now are able to create the webhook from Rollbar. Go to your project settings, then select the + button in the Integrations column:
 Select Webhook and proceed to the next page:
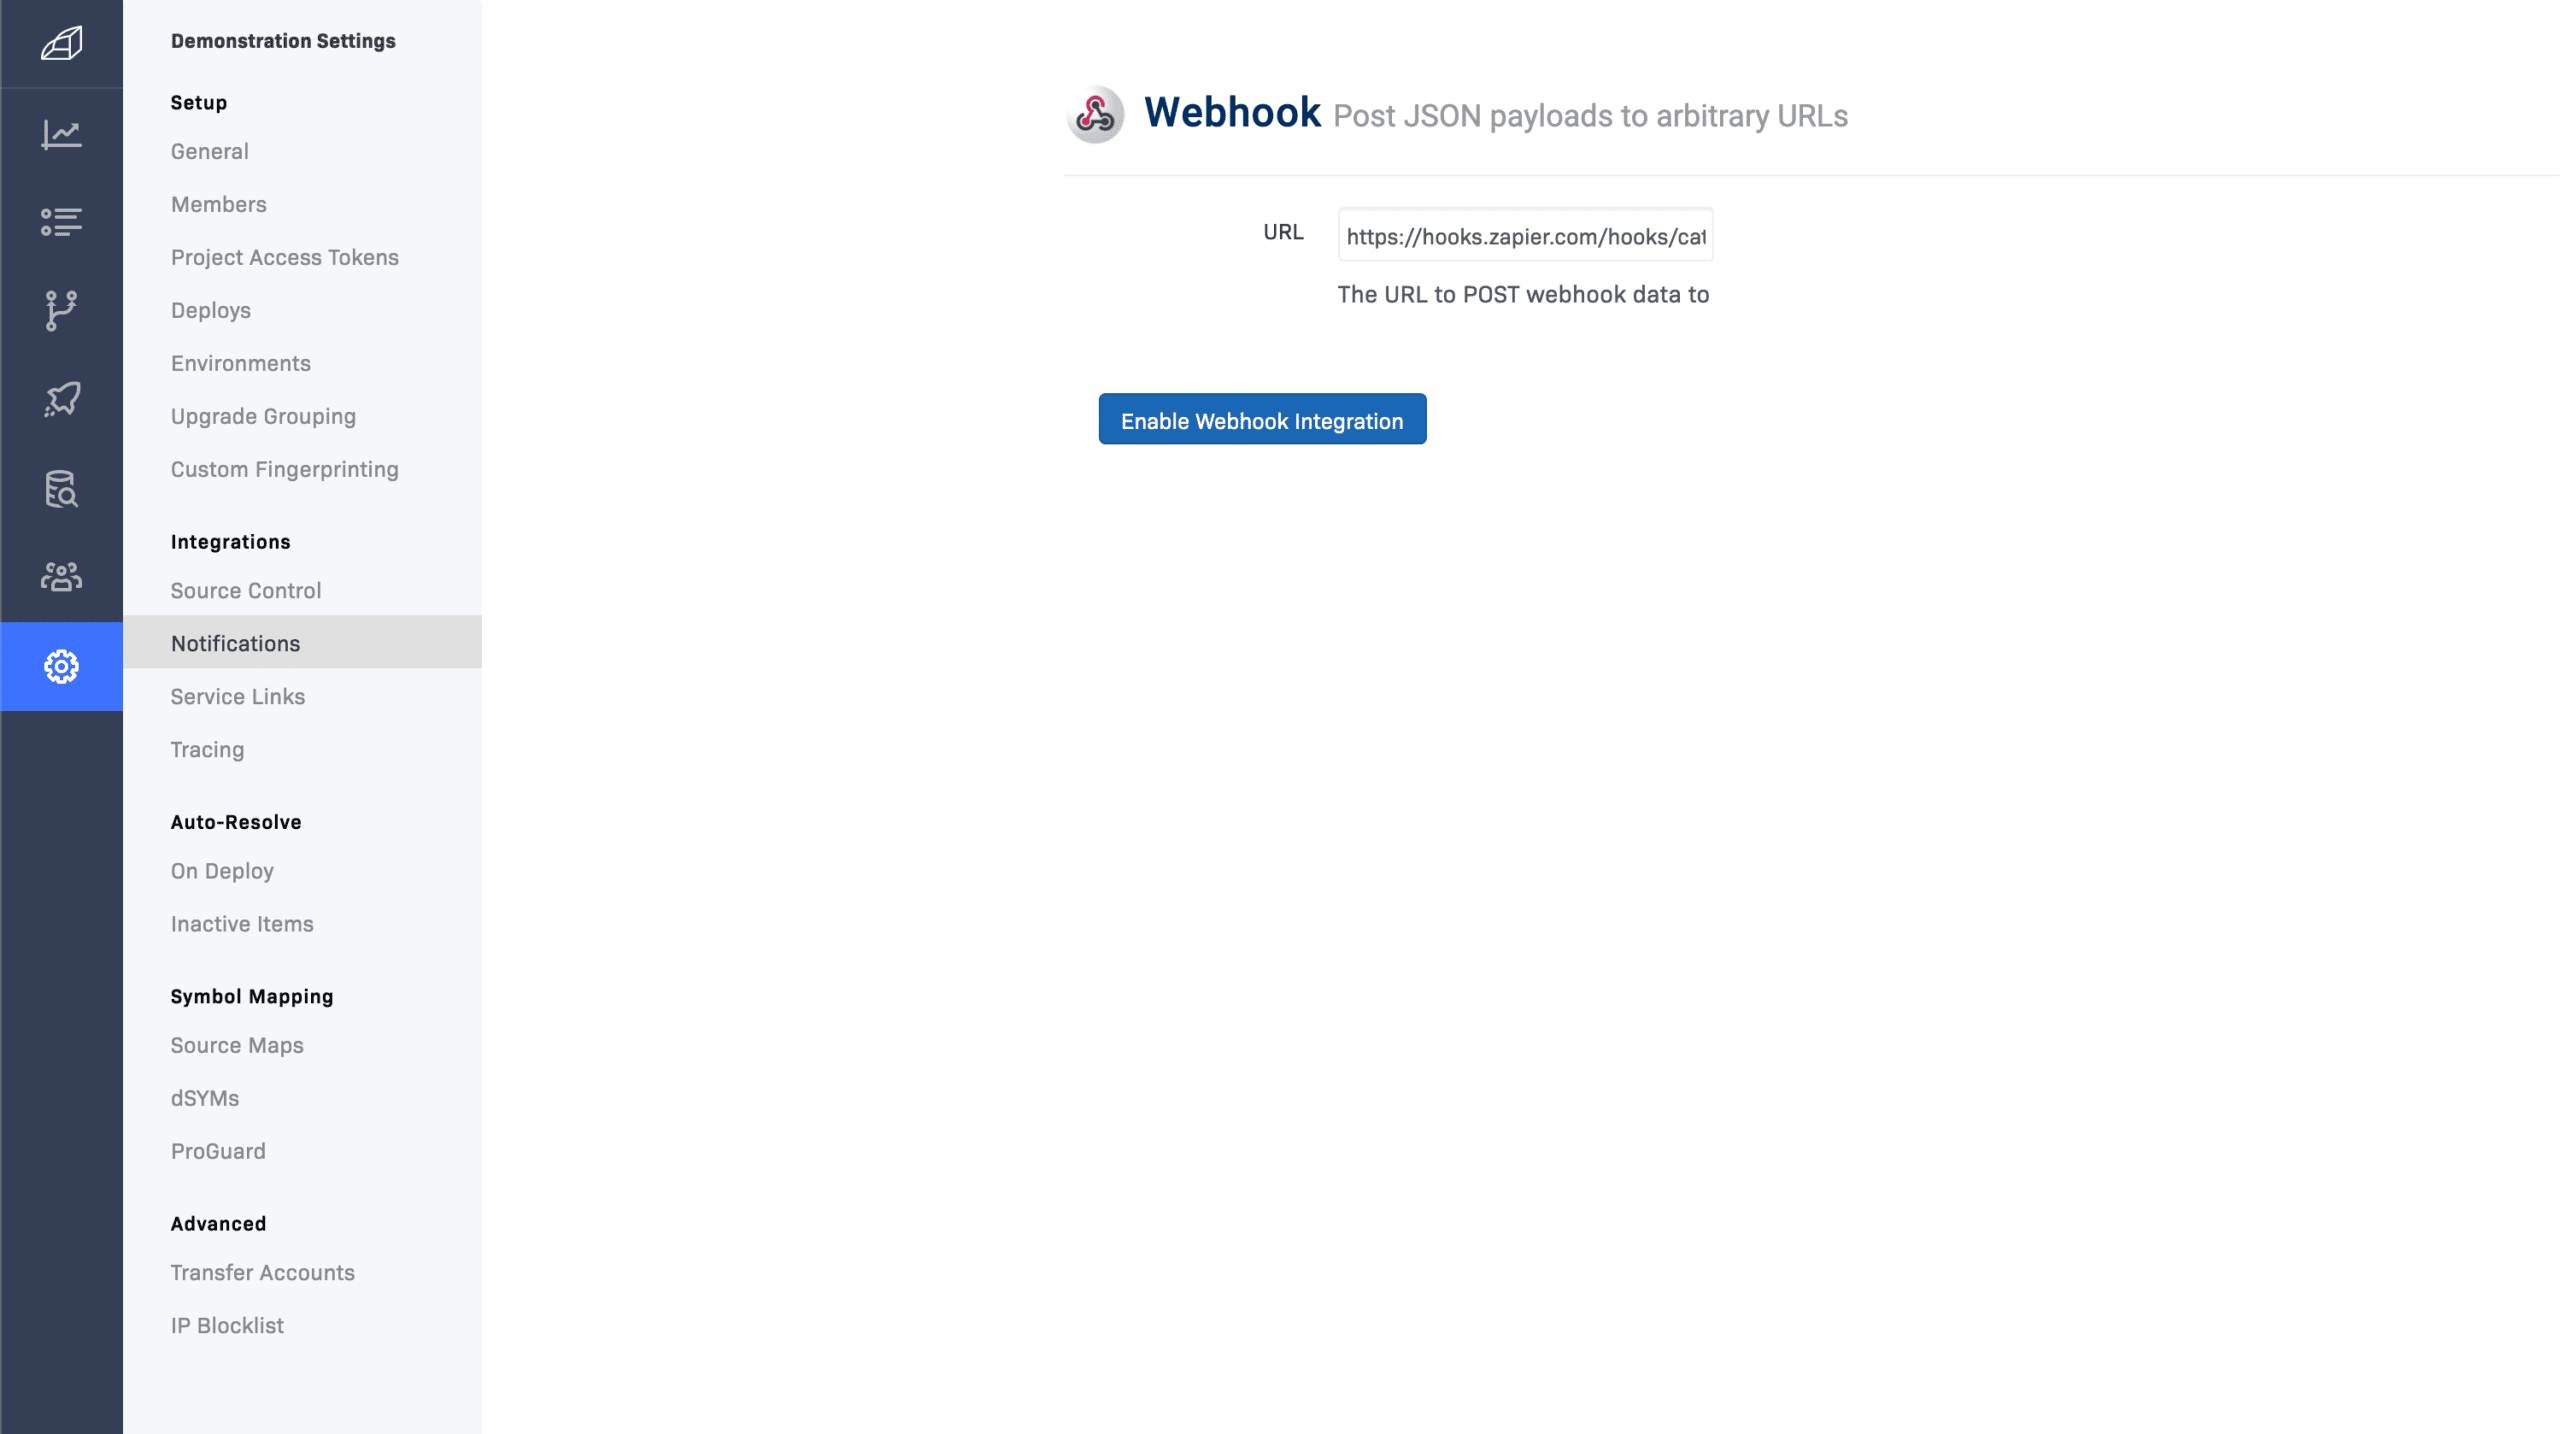
 Paste the webhook URL provided by Zapier into the box and click on Enable Webhook Integration.
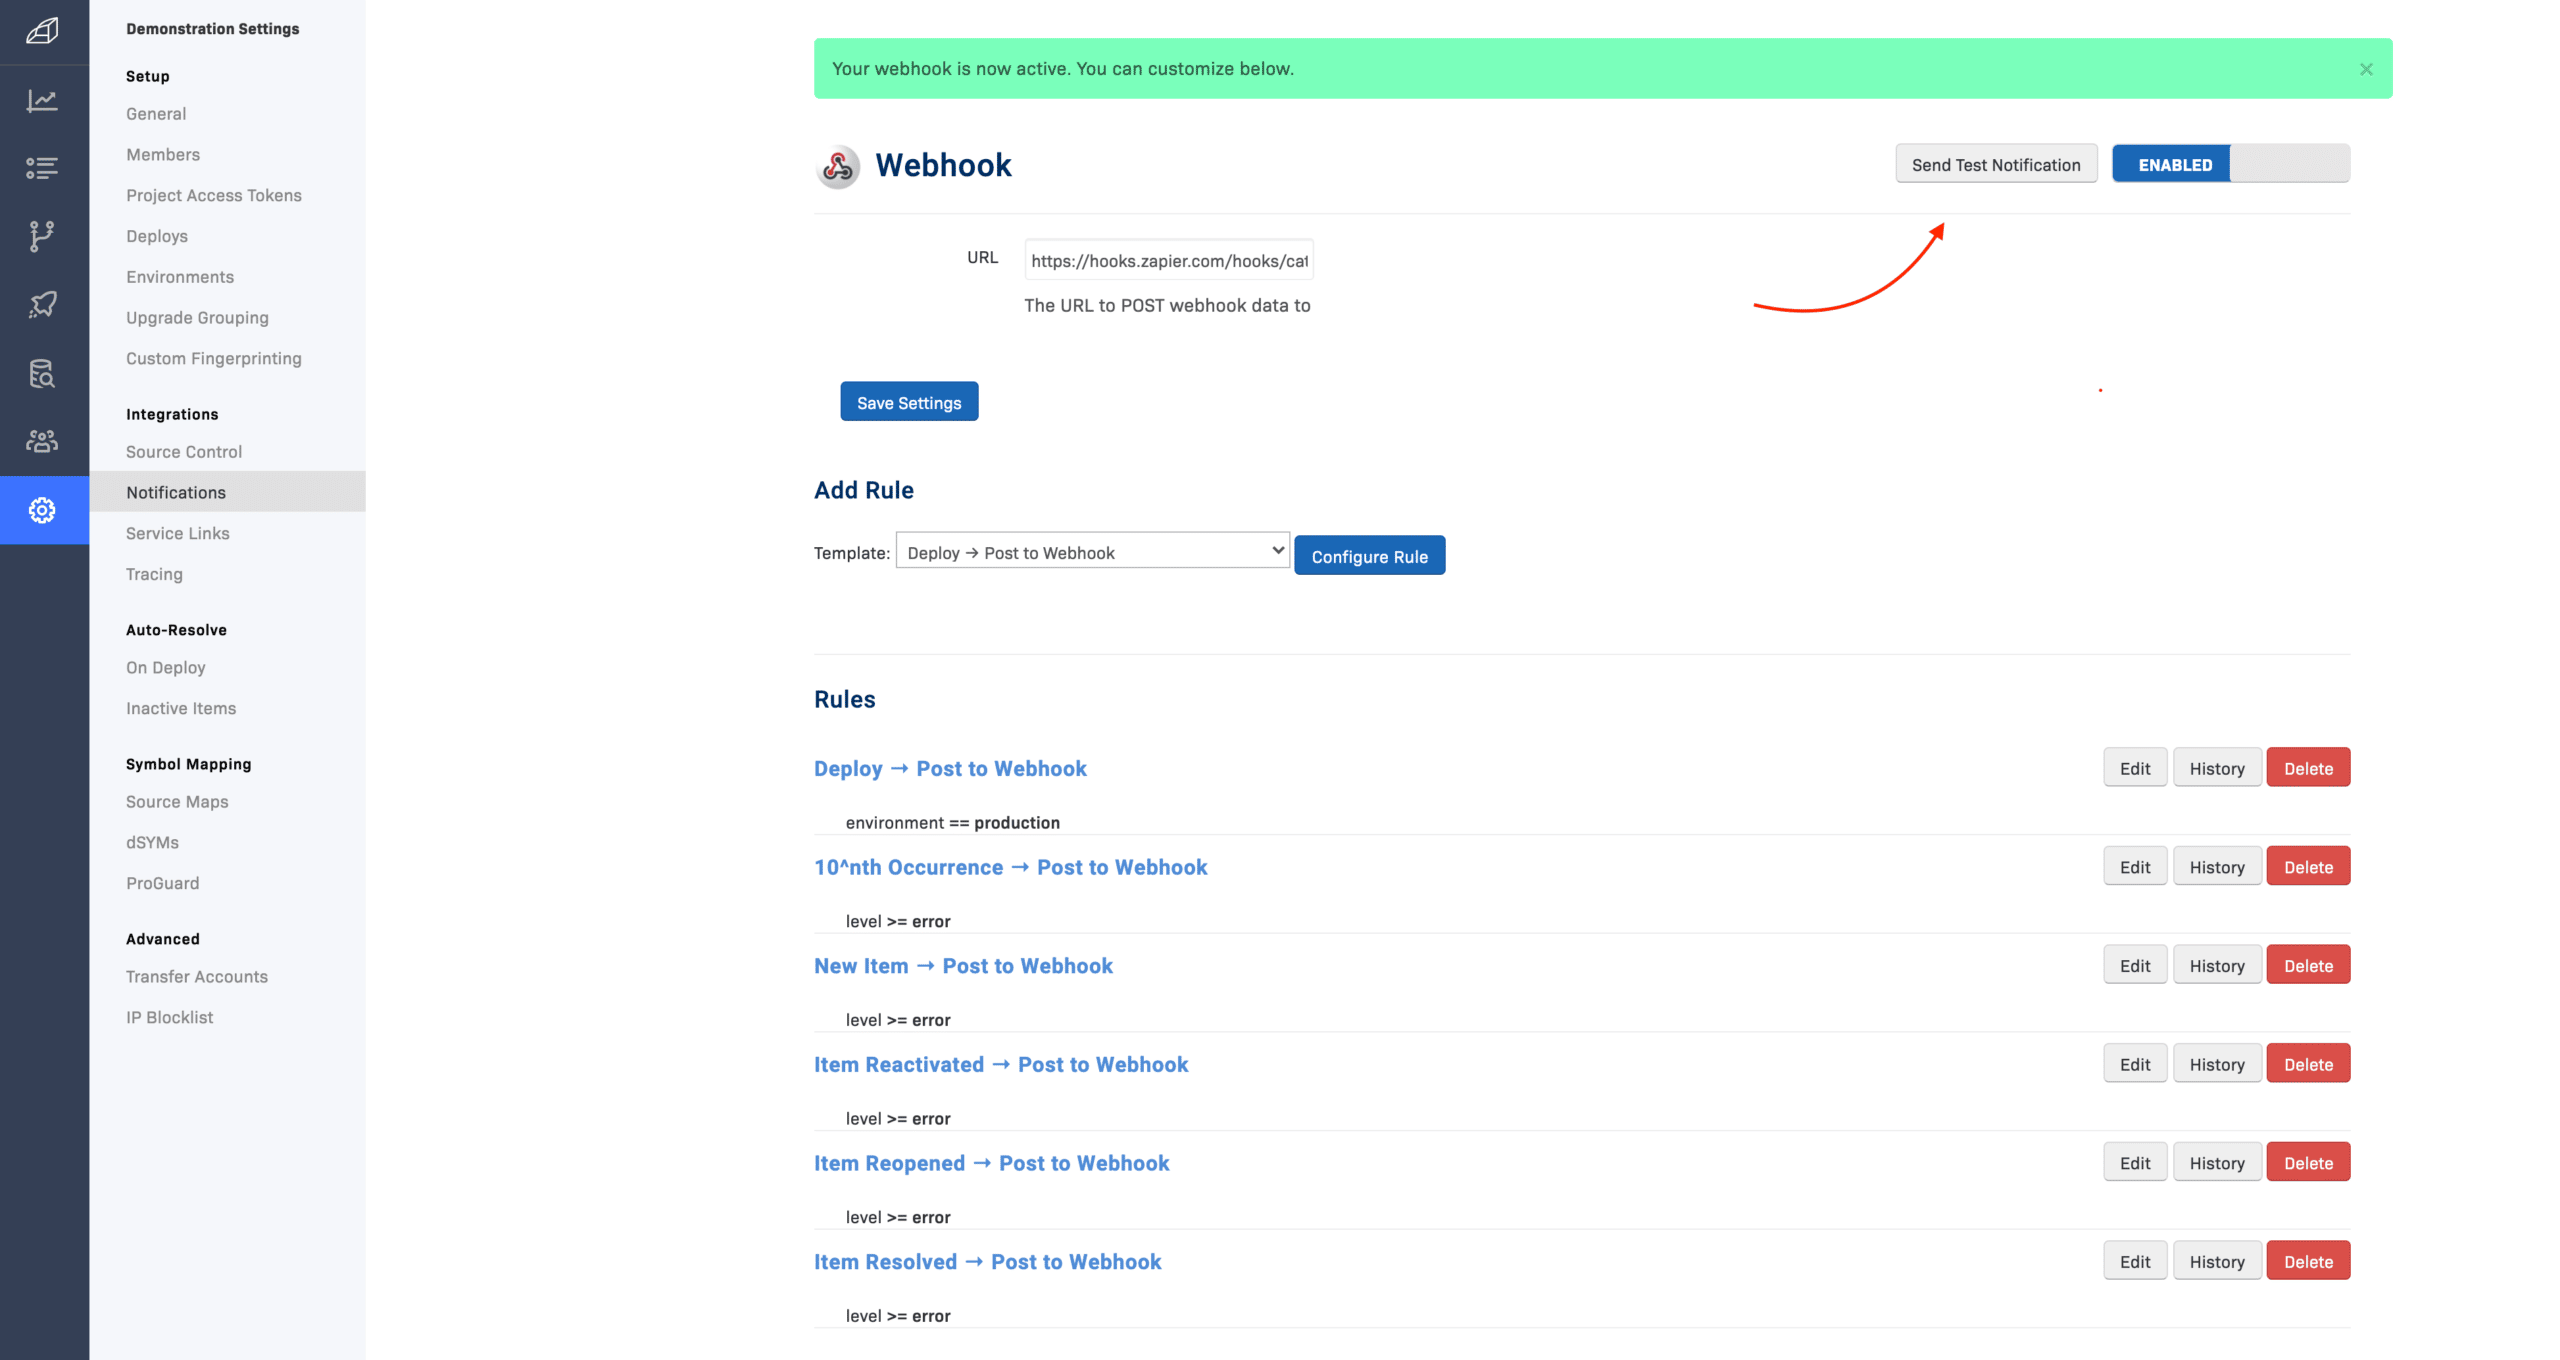
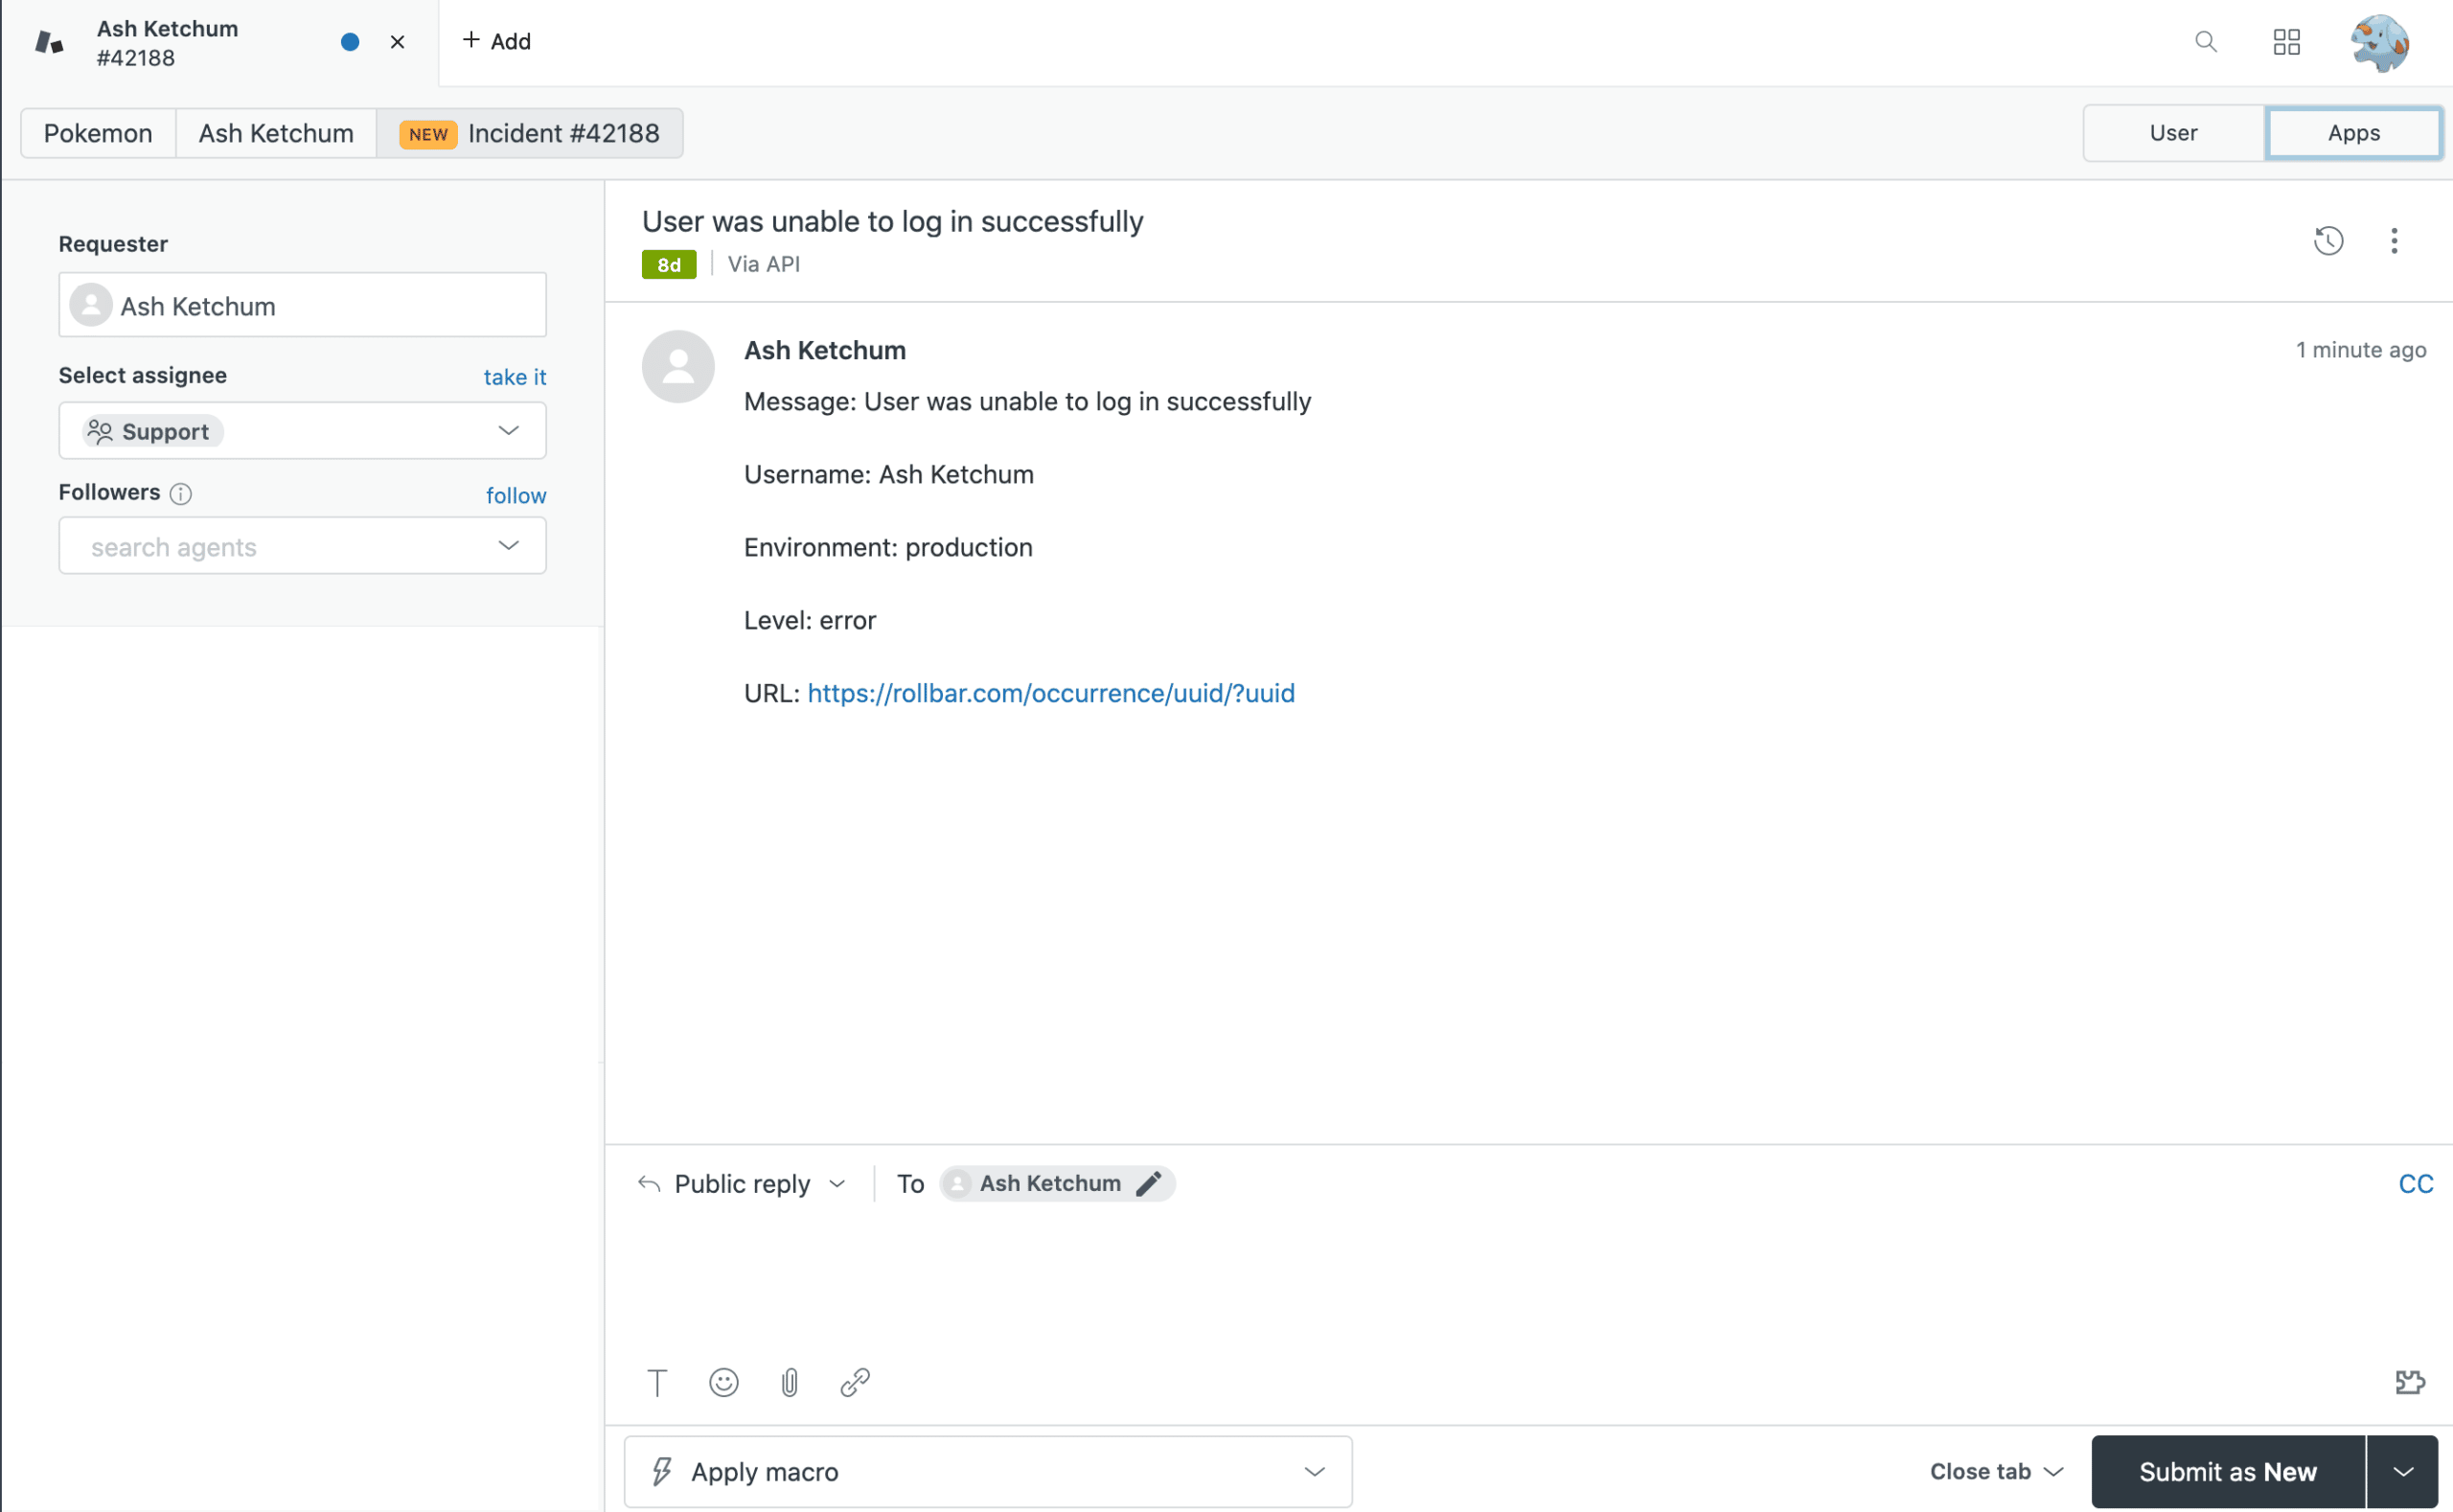
 Your webhook integration is now set up! You can click on Send Test Notification , or send an actual Rollbar error message from your Rollbar enabled environment. For this example, we will send a production error message which contains person tracking information.
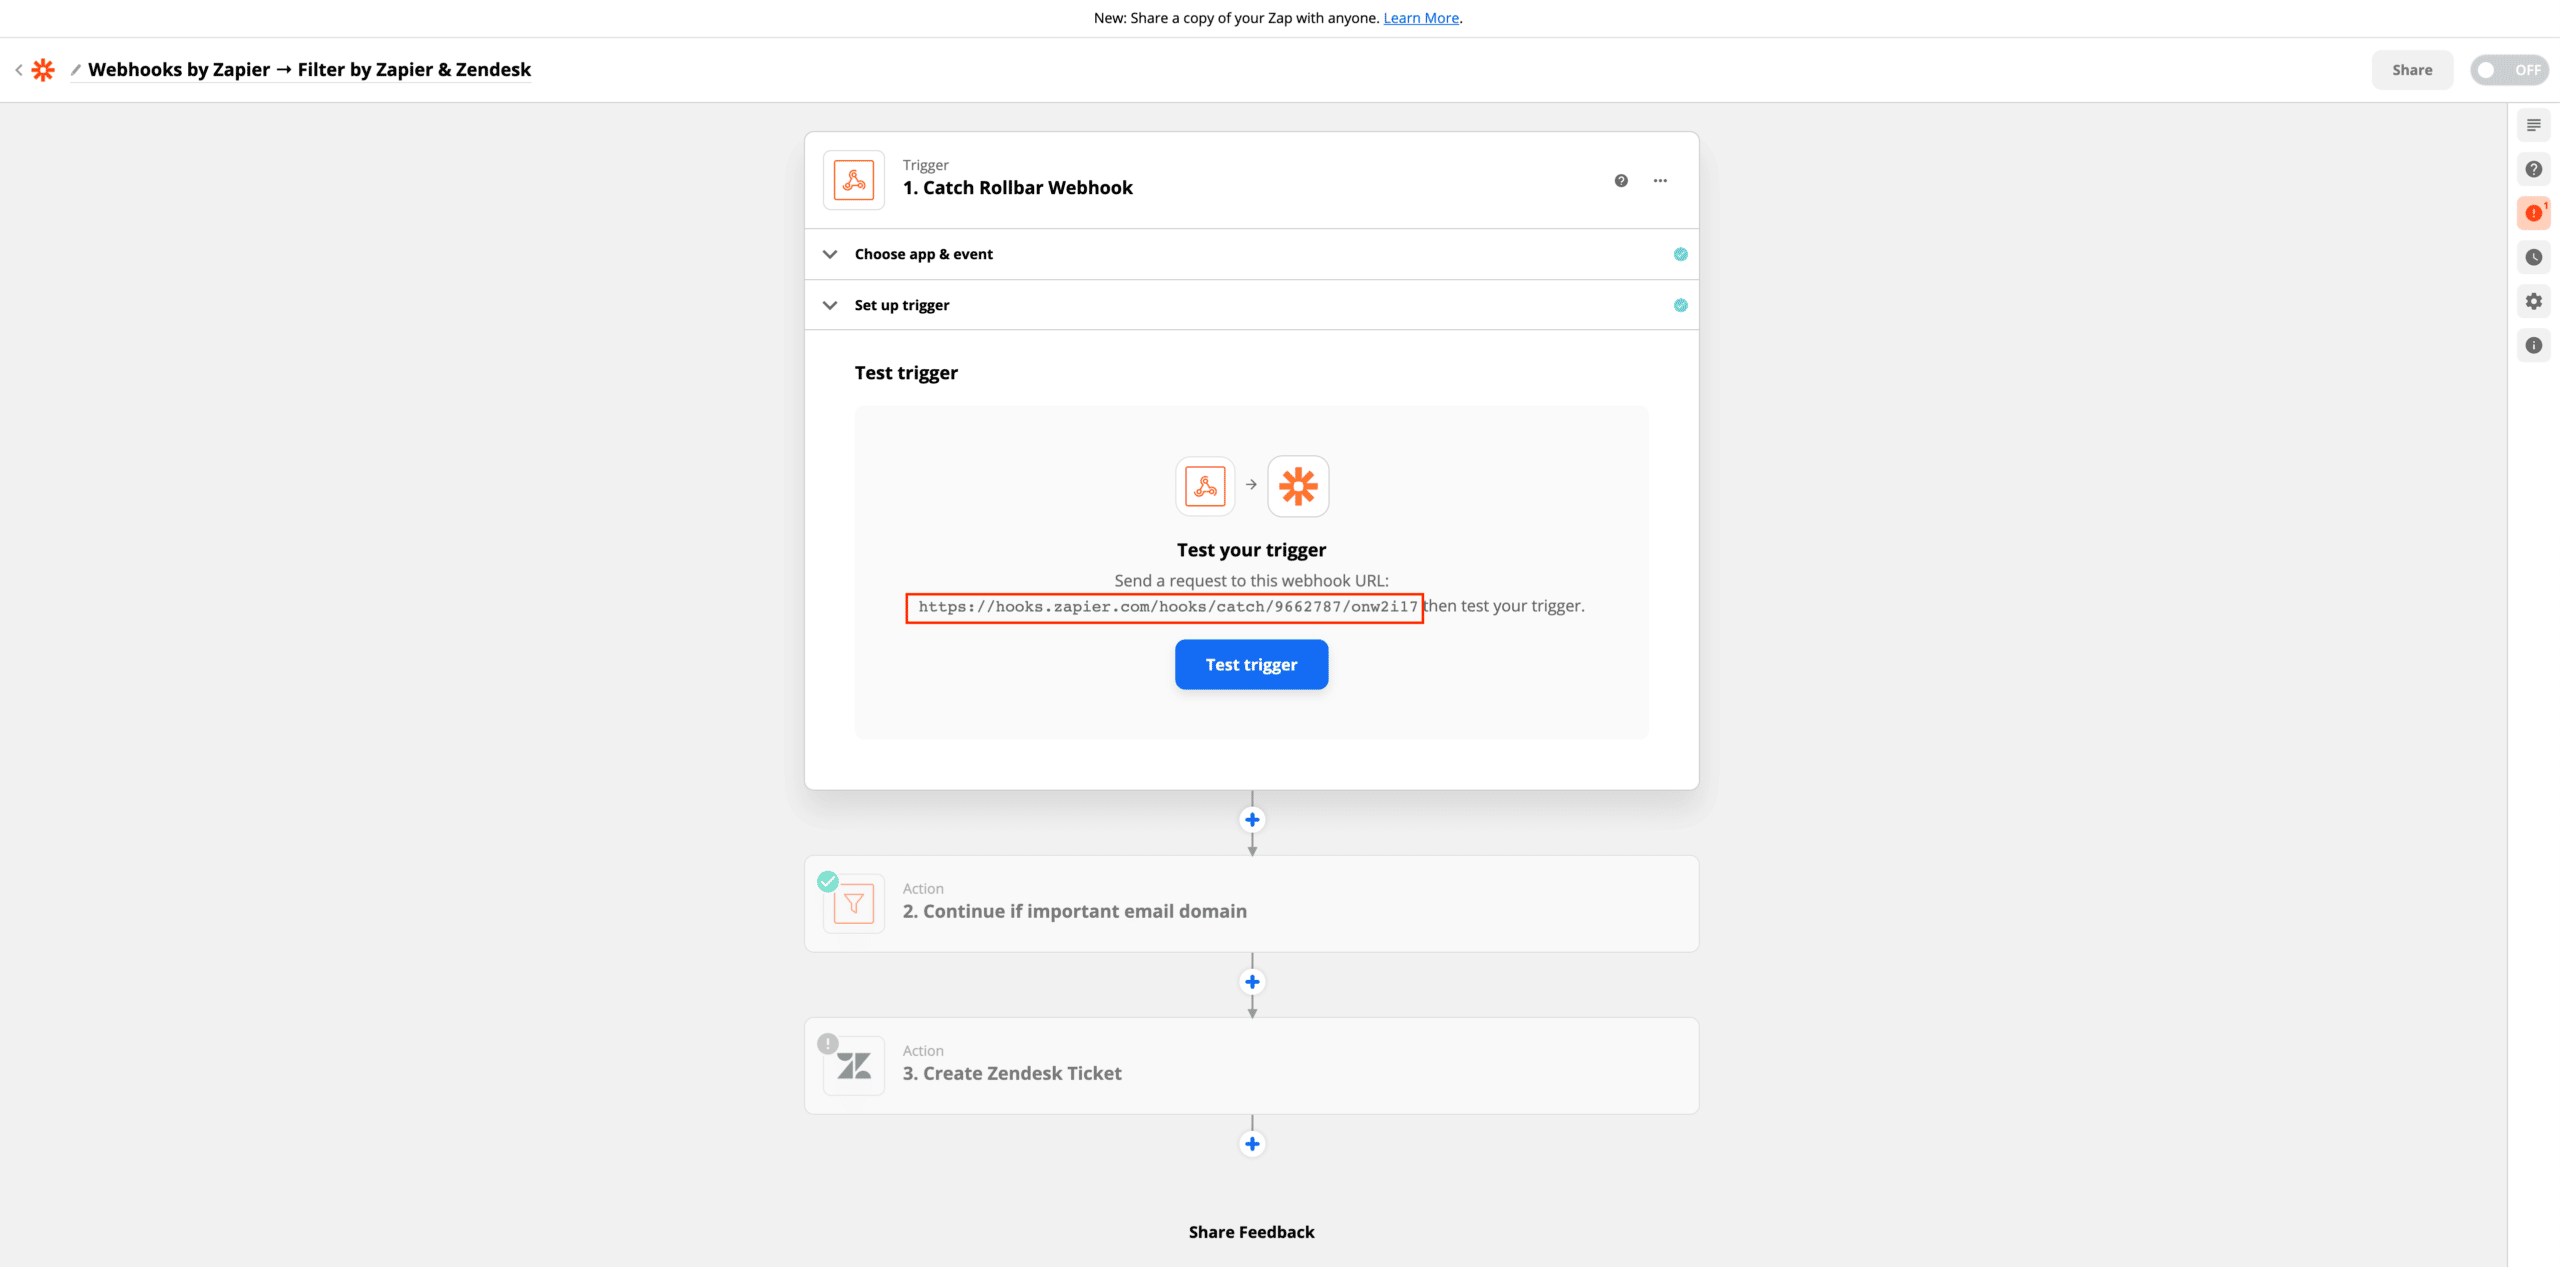
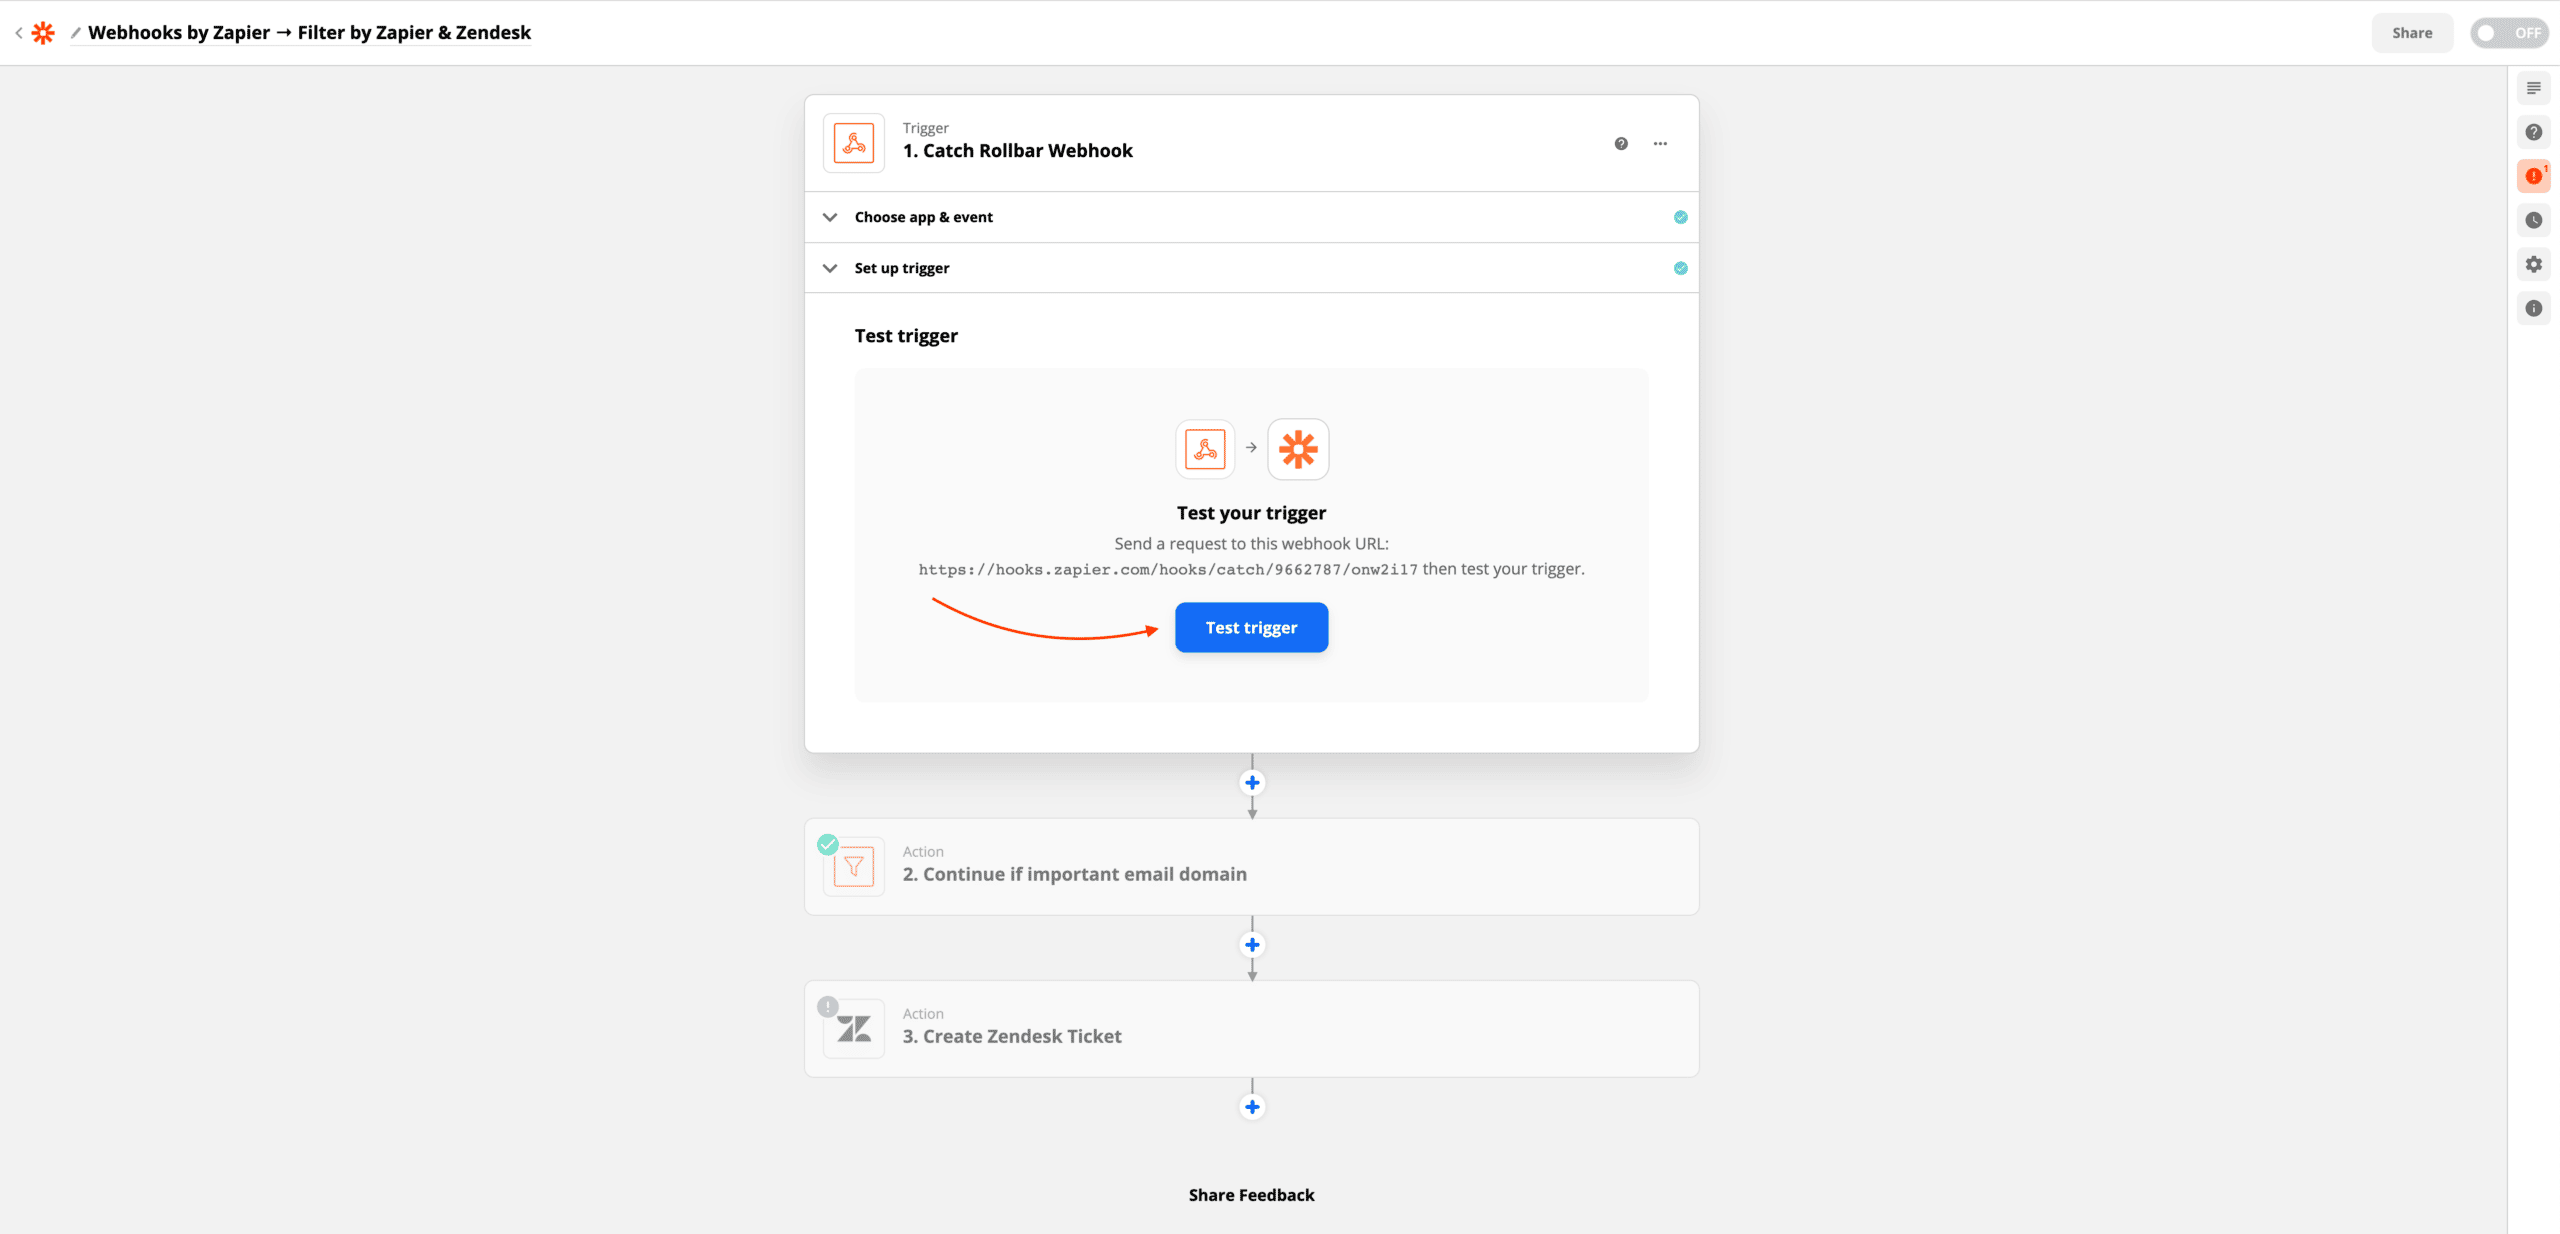
 After you create a new Rollbar item, navigate back to your Zapier workflow. Click on Test trigger to load your webhook information.
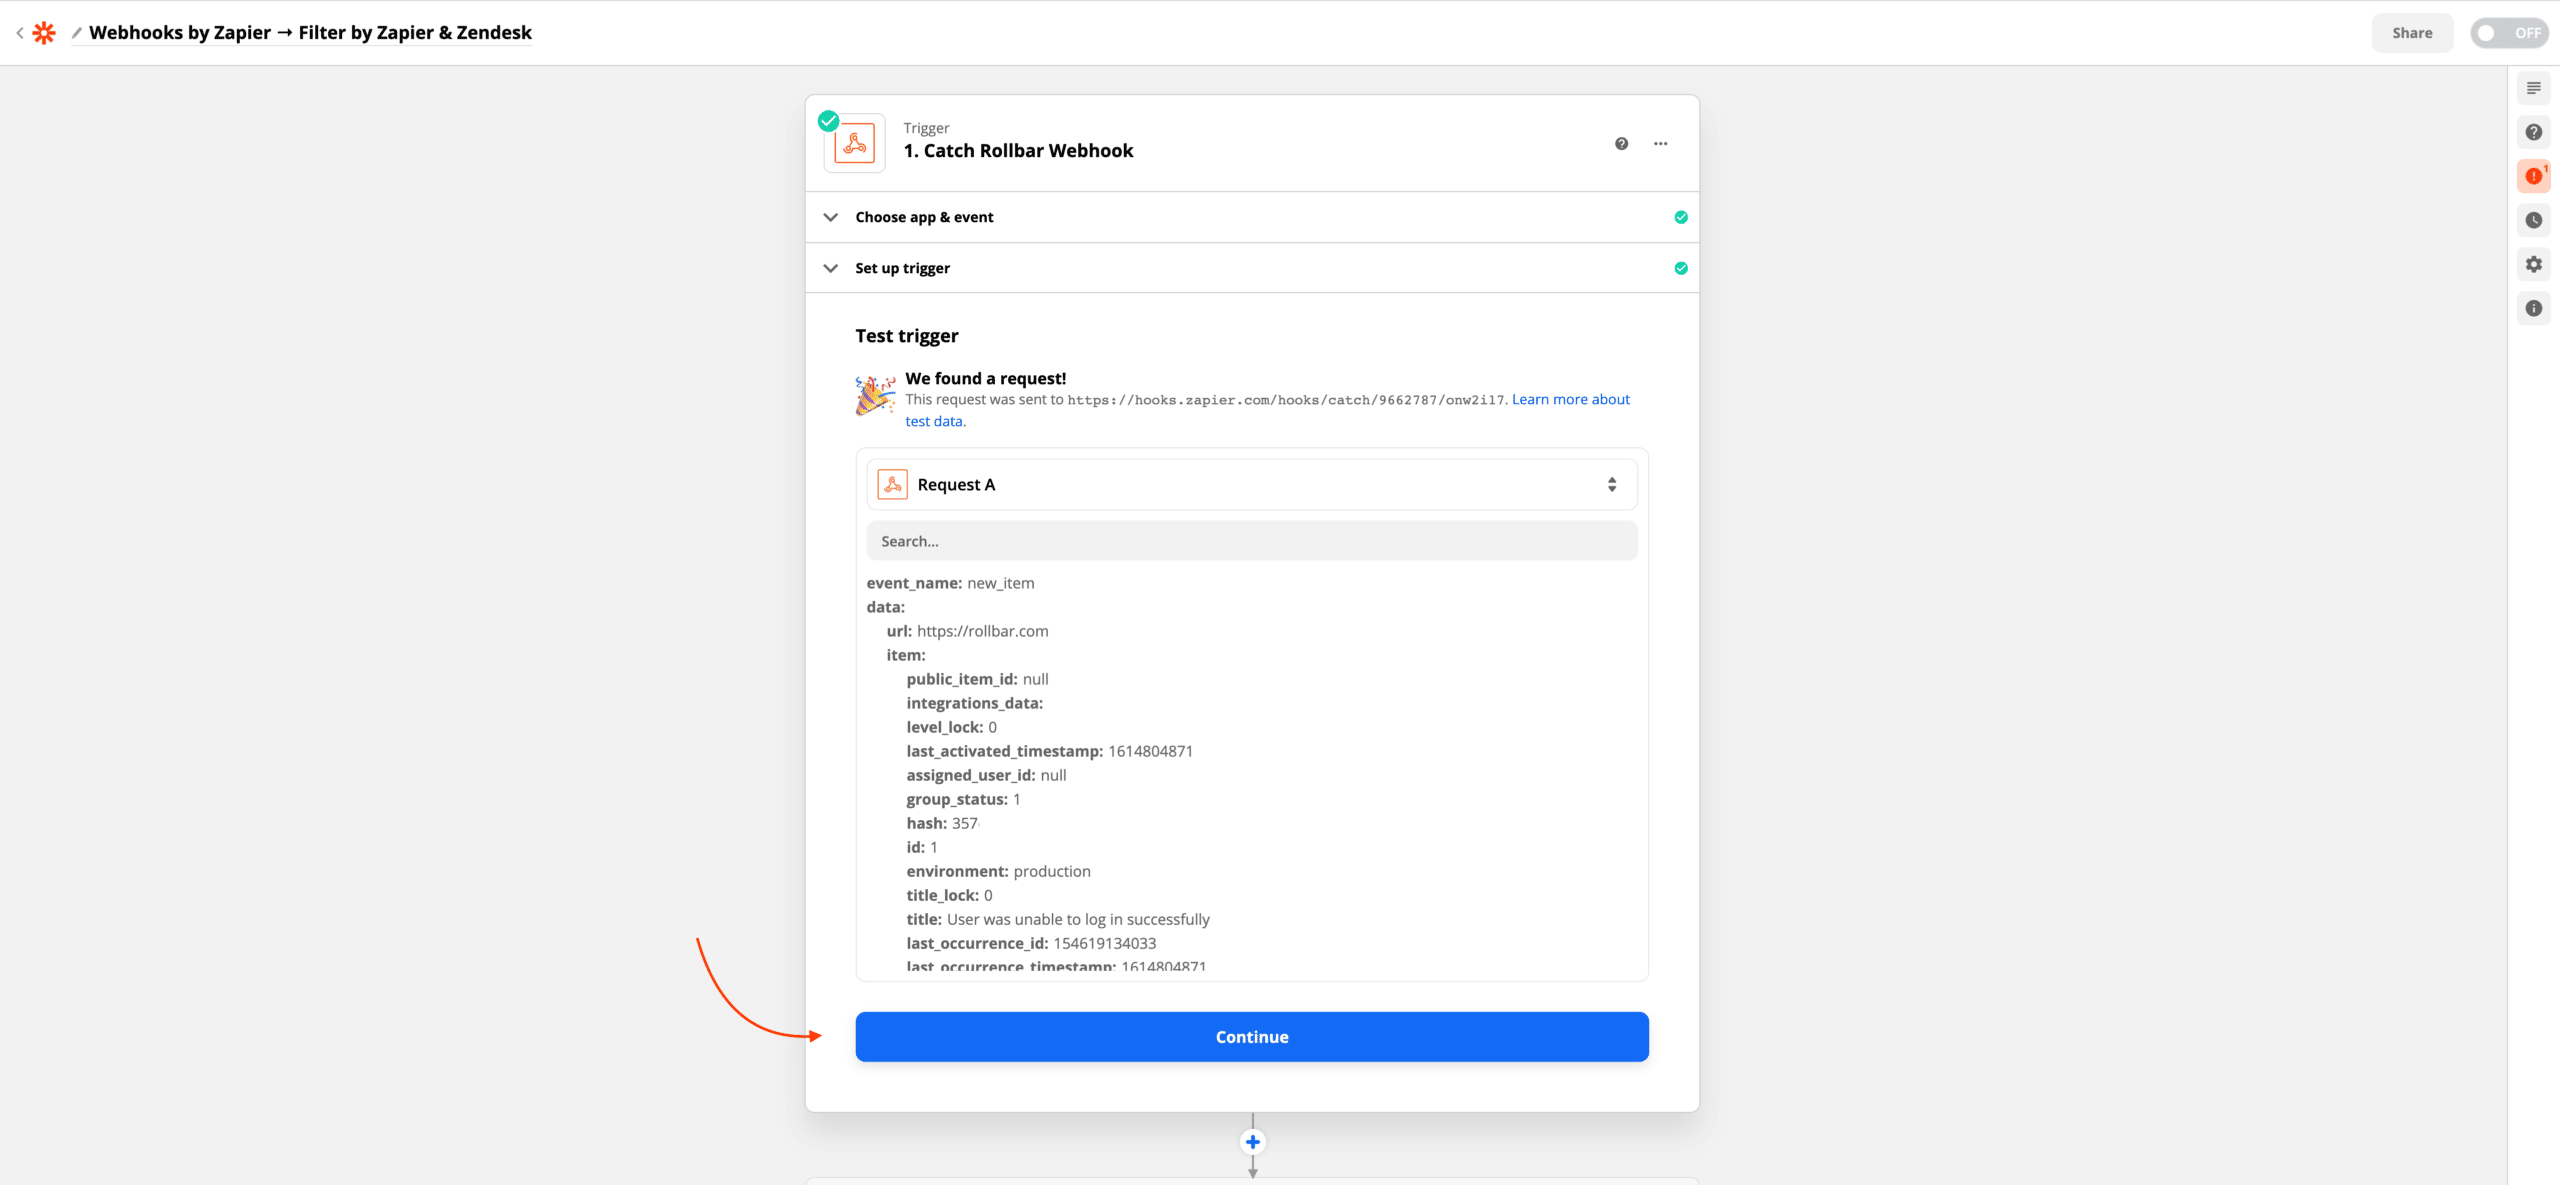
 Now, click on Continue to edit the filter.
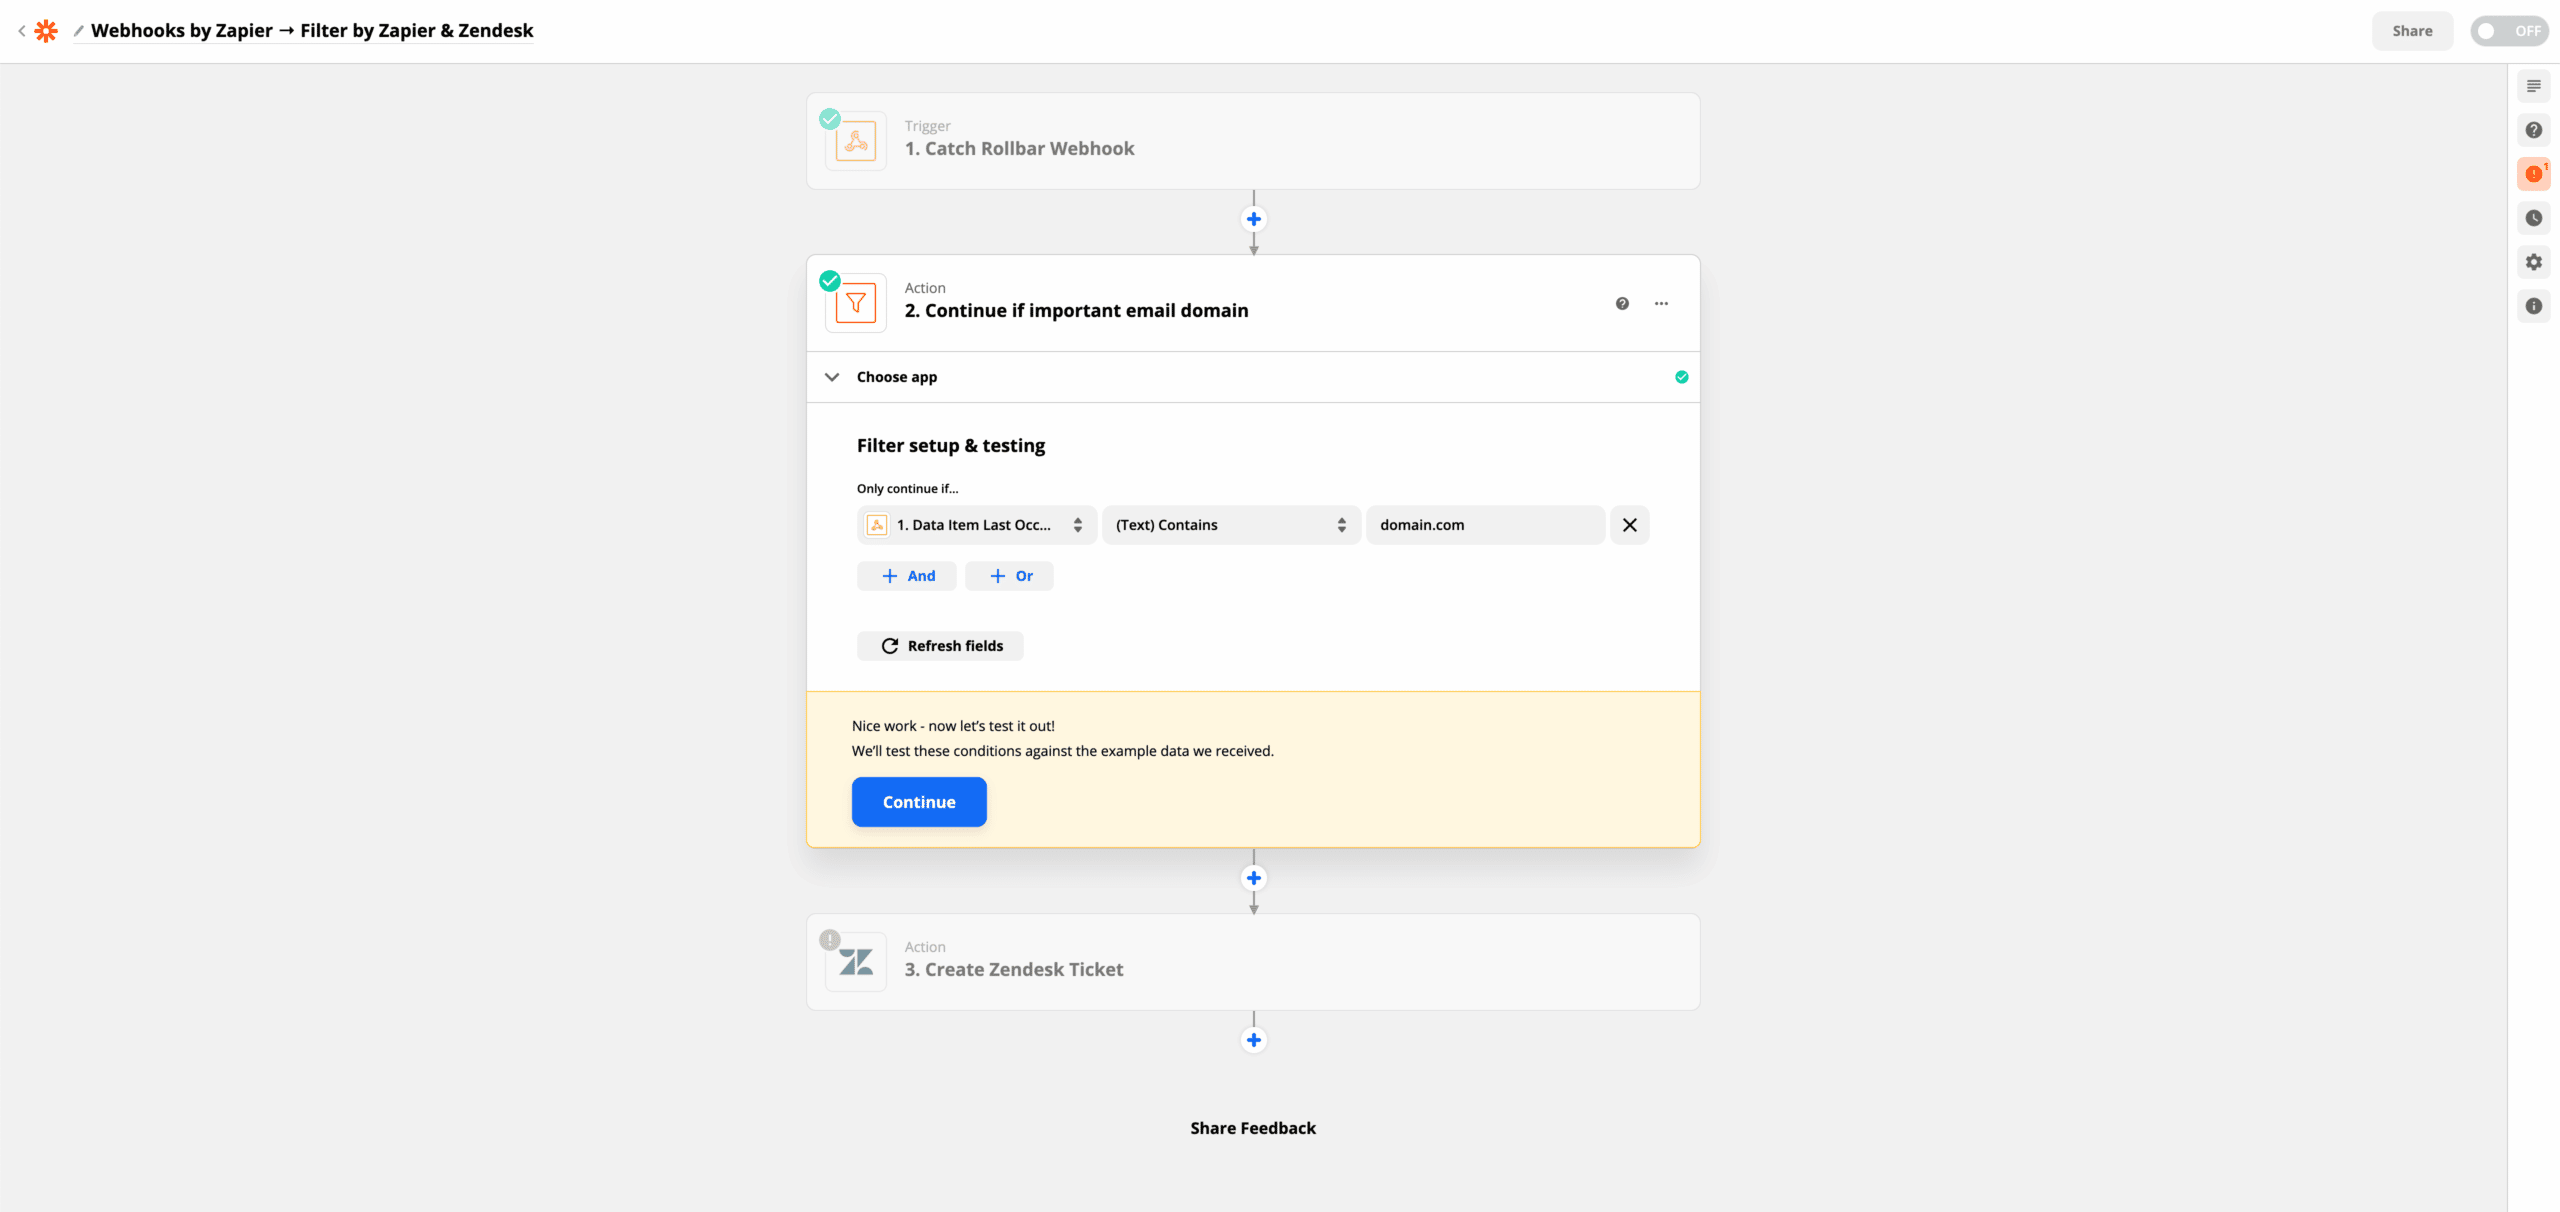
 This Zap automatically filters emails based on their domain. This means that only users in those domains will automatically create Zendesk tickets. Edit these filters to your own specifications. Then click Continue.
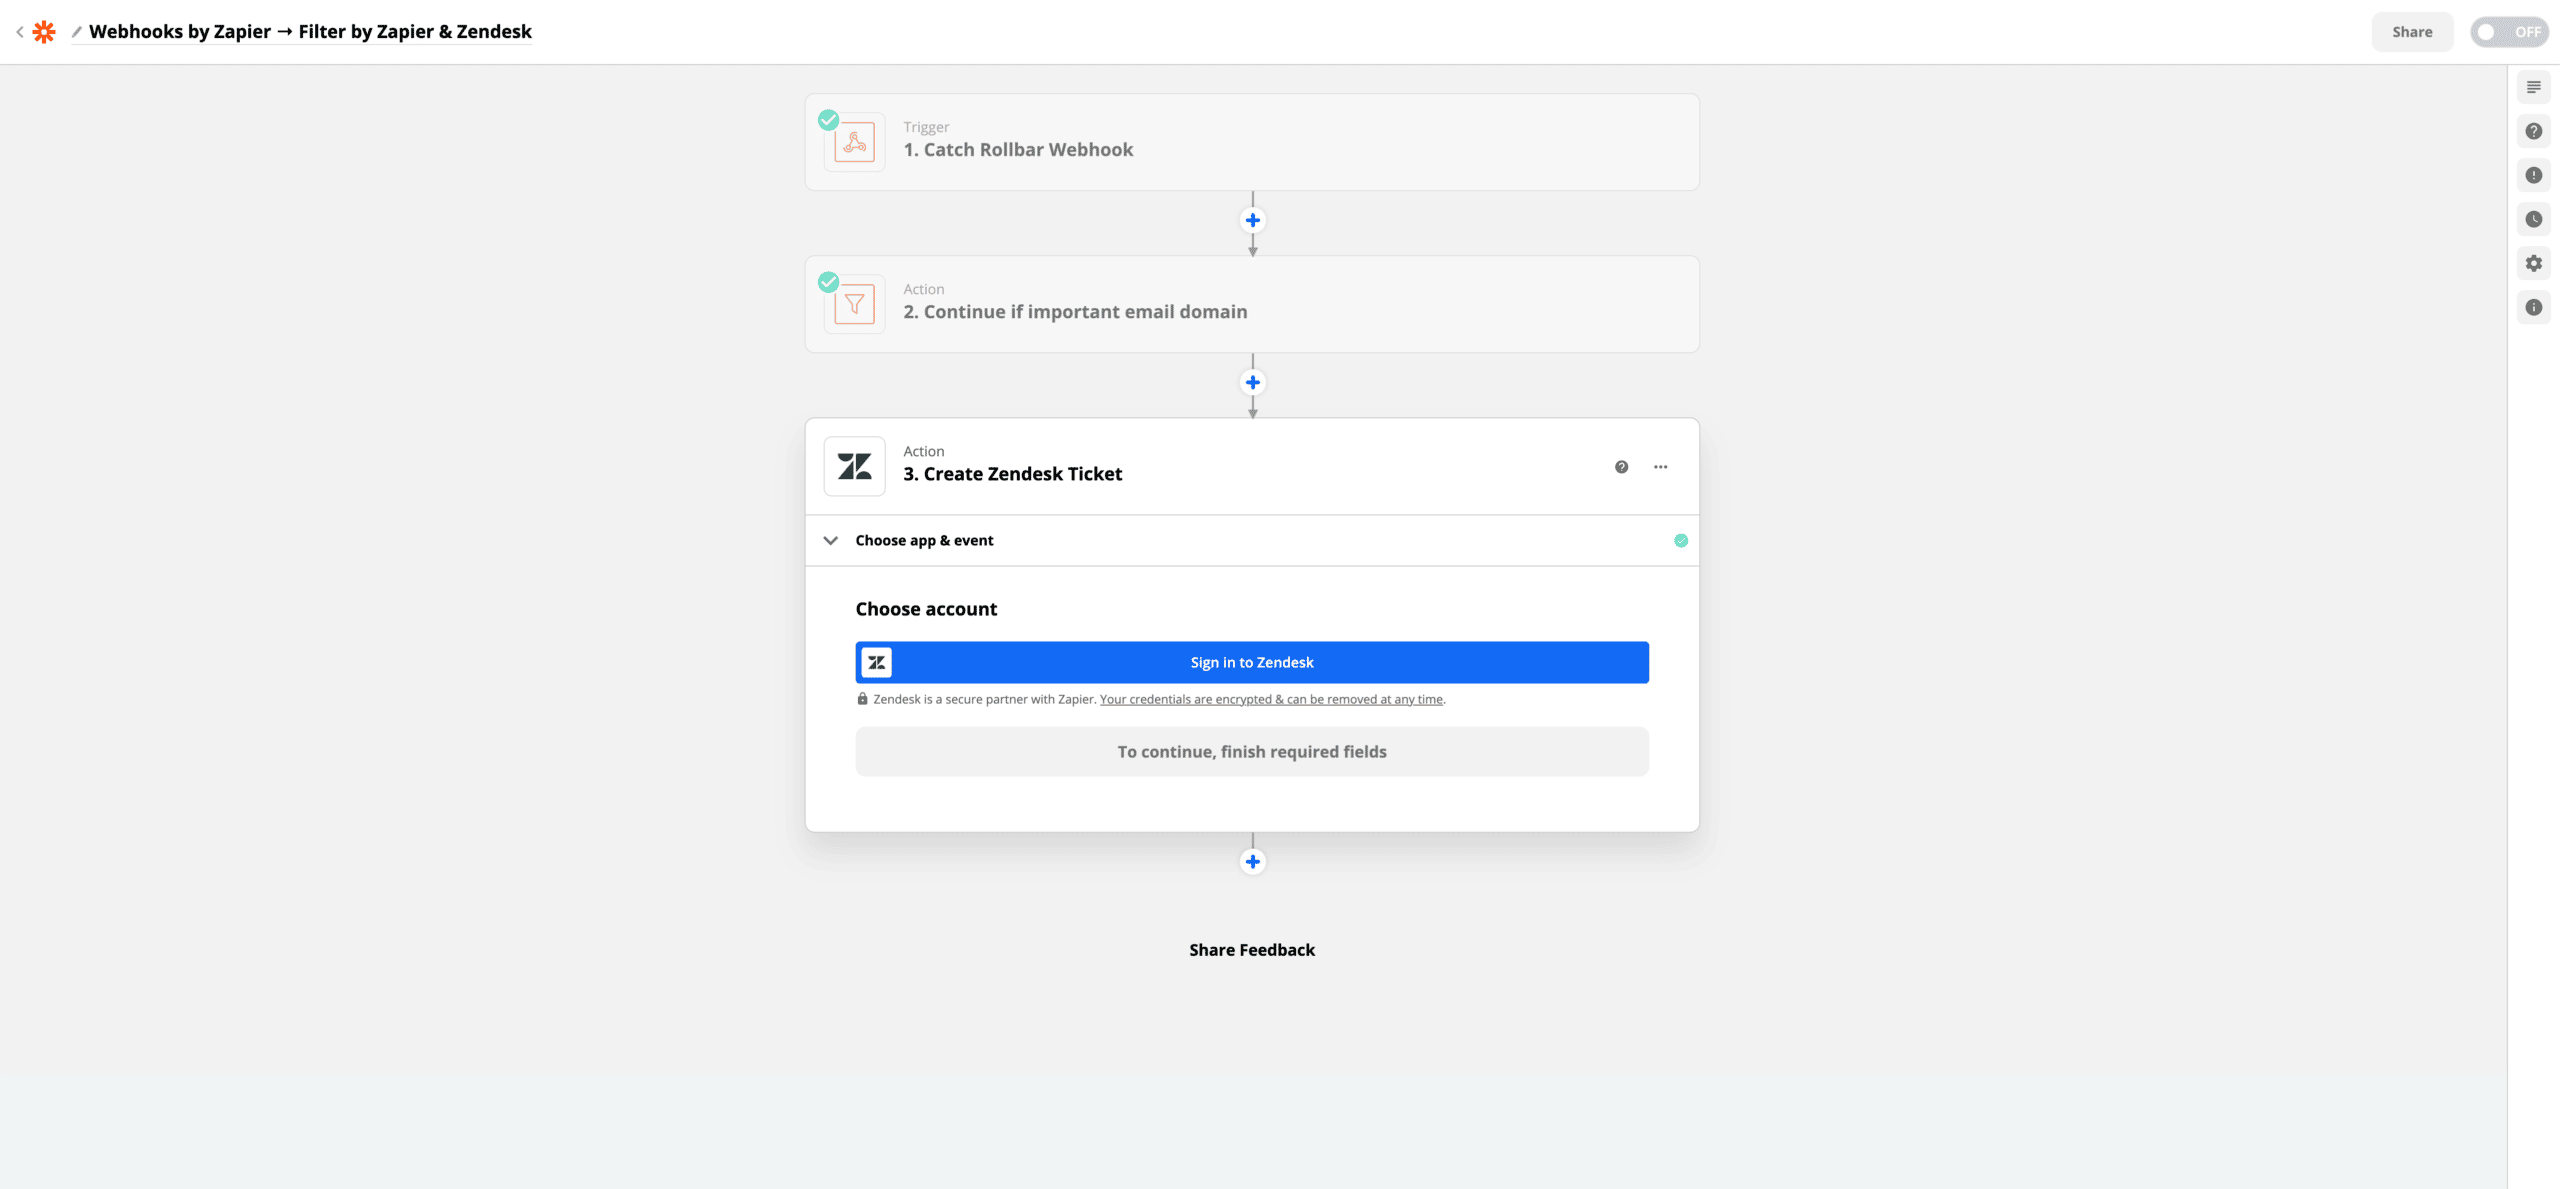
 Click Sign in to Zendesk to allow Zapier to create tickets. You can edit any fields or data you wish edit any fields to your own needs.
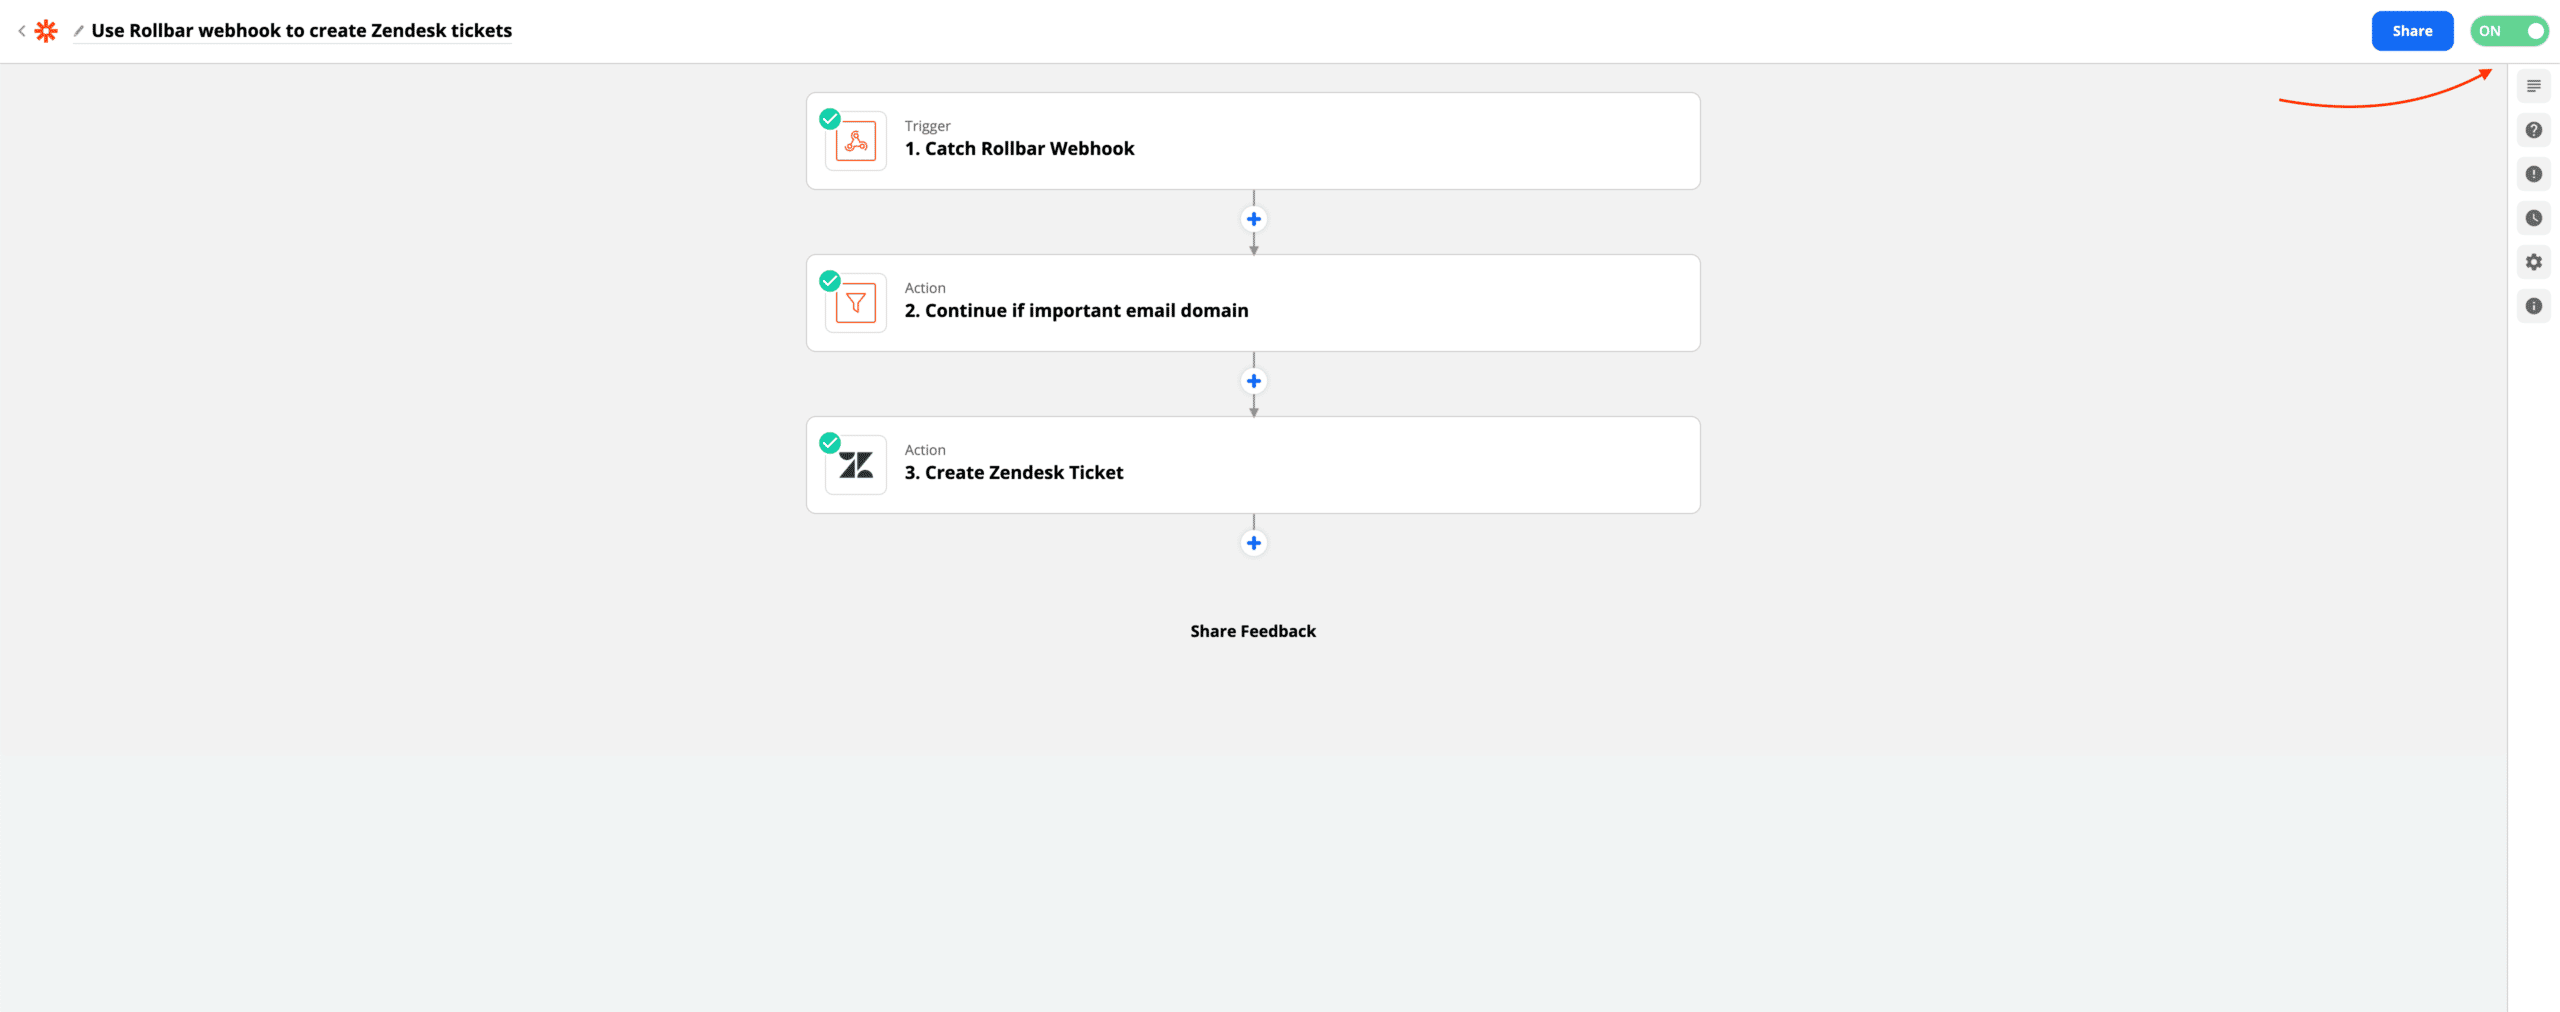
 Now, enable the Zap by clicking the button on the top right.
 That’s it! All future Rollbar errors which meet your criteria will automatically create Zendesk tickets.
Learn more
Read more about webhooks and our people tracking features.
Learn how you can enable your Support teams with the help of People tracking.
Visit our Support page and check out our articles, guides and webinars to learn more about Rollbar features and best practices. Didn’t find what you were looking for? Contact us and our Support team will help you with your questions.
Updated over 2 years ago