Jira
Create issues in Jira for Rollbar items
For general information about Rollbar's issue tracking features, check out the Issue Tracking guide.
In Jira
In order to connect Rollbar to Jira, you must configure an Application Link between Rollbar and Jira.

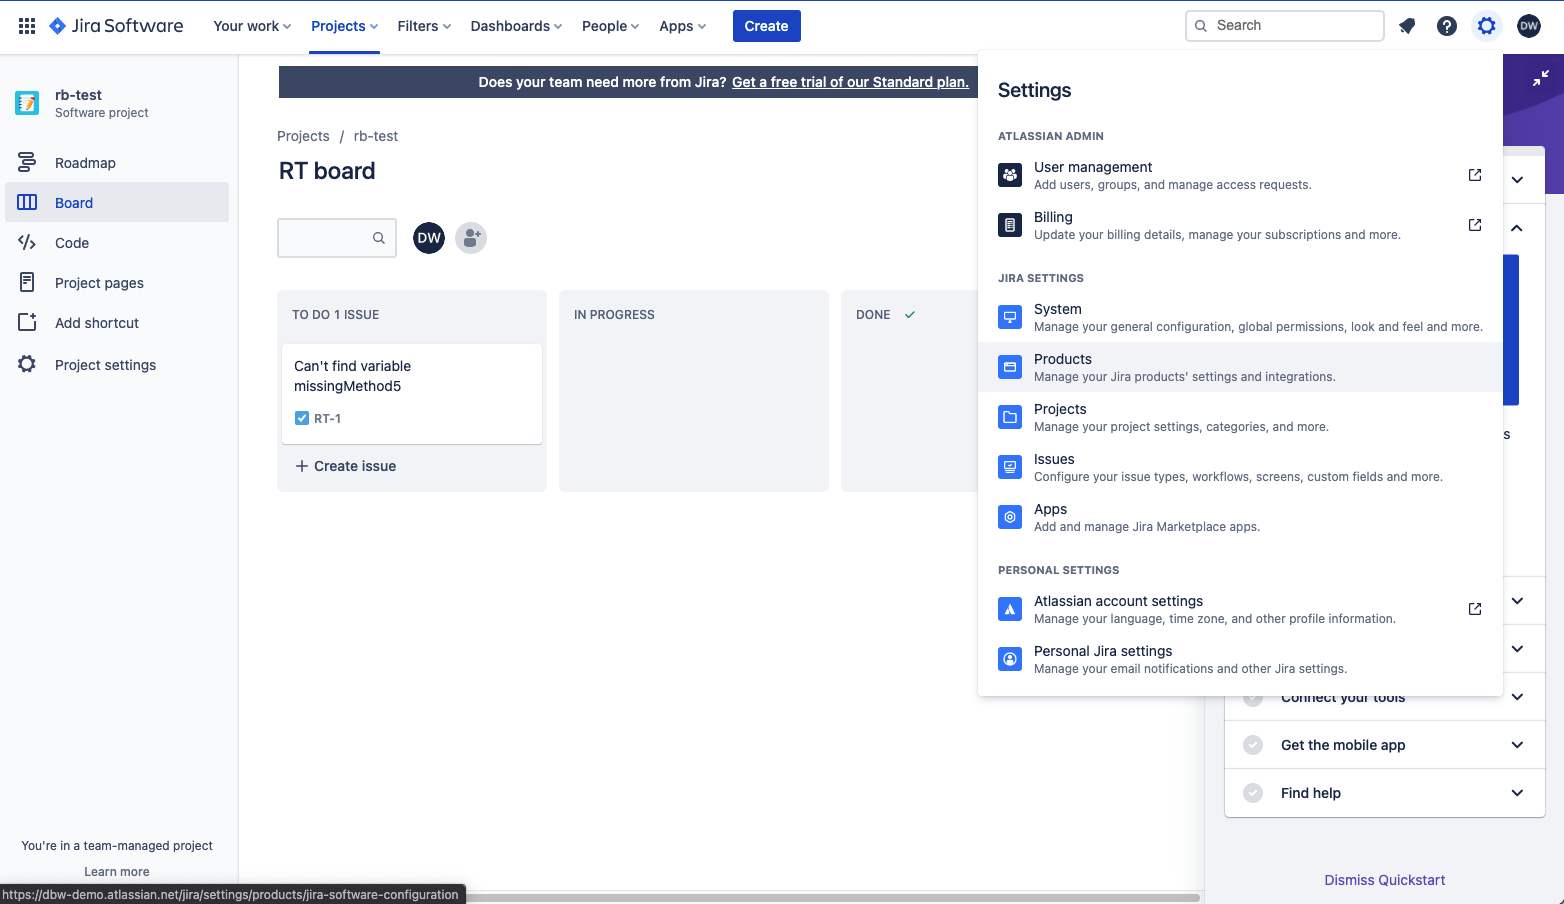
The correct menu is located in Settings > Products, not in the Apps dropdown.
- Go to Settings (gear icon in top right corner) → Products → Application Links, enter the URL
https://rollbar.comand click Create New Link
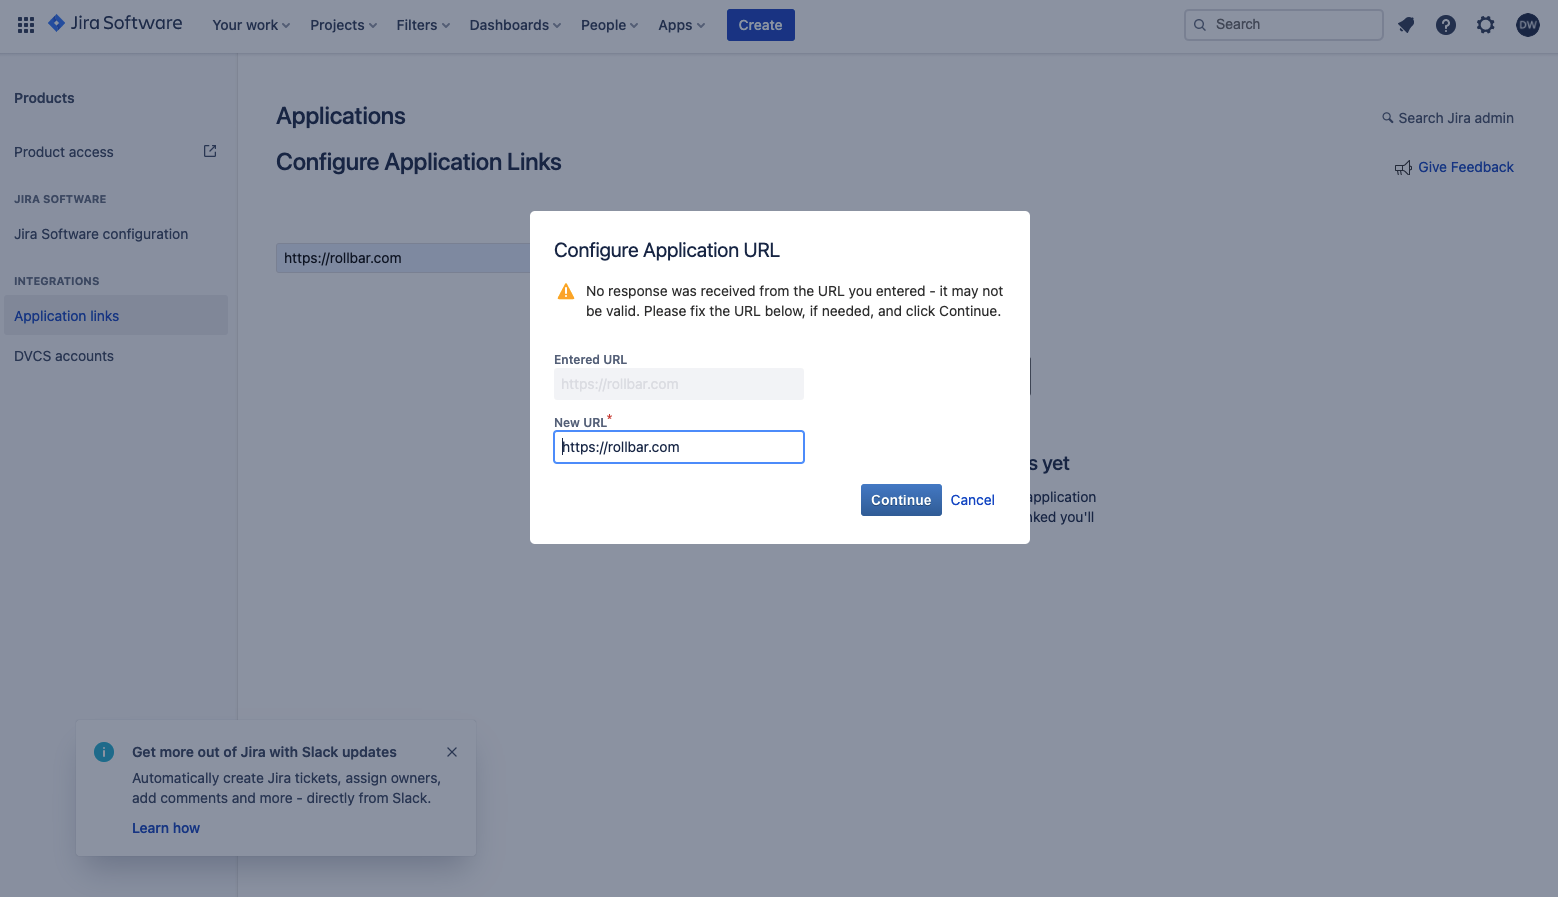
- You may see "No response was received from the URL you entered - it may not be valid. Please fix the URL below, if needed, and click Continue." This is nothing to worry about. You can just click Continue and it will work.

The warning message shown here can be ignored, just click Continue
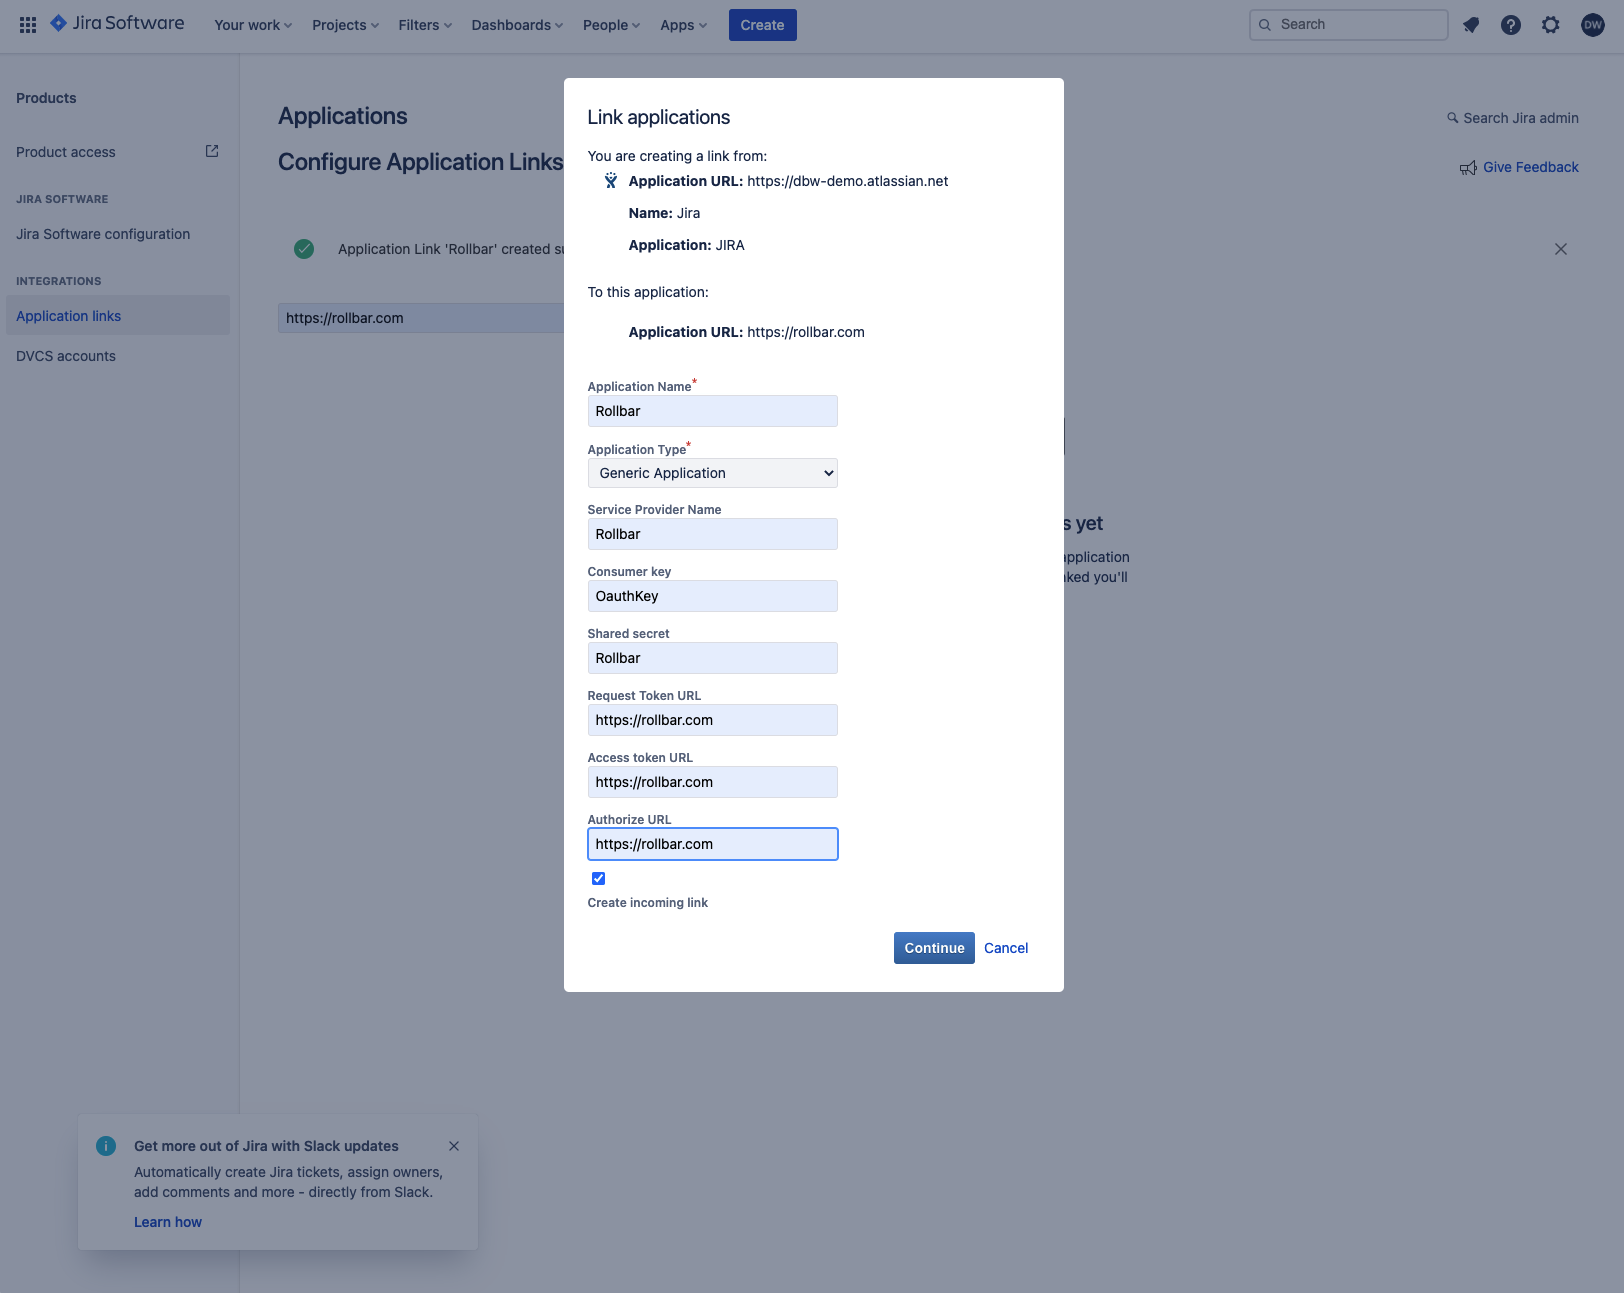
- In the form that appears, enter the following values:
- Application Name:
Rollbar - Application Type:
Generic Application - Service Provider Name:
Rollbar - Consumer Key:
rollbar-jira-app-link-key - Shared Secret:
Rollbar - Request Token URL:
https://rollbar.com - Access Token URL:
https://rollbar.com - Authorize URL:
https://rollbar.com - Create incoming link:
Checked

The rollbar-jira-app-link-key value must be an exact match, it is case-sensitive.
Notification of Consumer Key Changes
Applications that were integrated BEFORE November 7, 2024 will use the consumer key value of
Oauthinstead of the ofrollbar-jira-app-link-key.
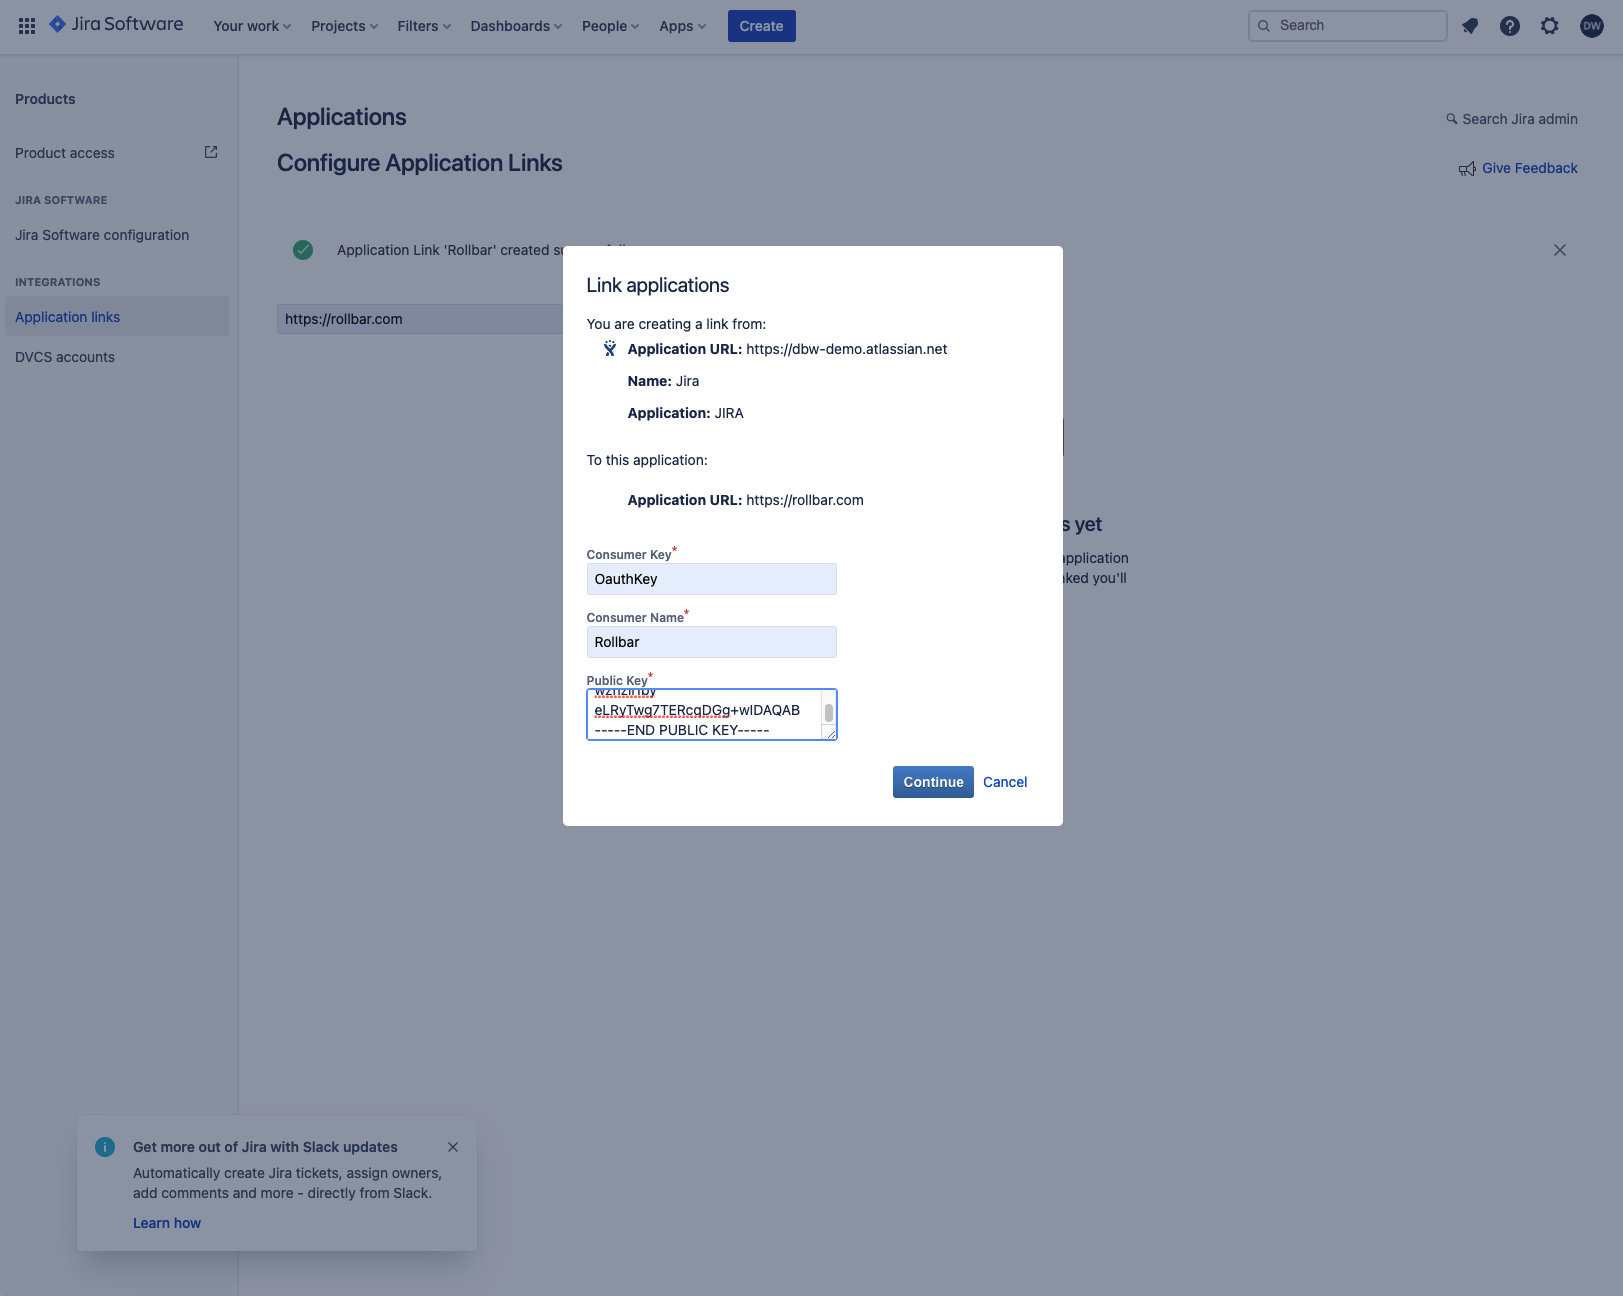
- Click Continue and then enter the following values in the next screen:
-
Consumer Key:
rollbar-jira-app-link-key -
Consumer Name:
Rollbar -
Public Key:
-----BEGIN PUBLIC KEY-----
MIGfMA0GCSqGSIb3DQEBAQUAA4GNADCBiQKBgQC+unu+VFdOomVs4Rzn0YKNHgOj
CM7n3PvFjE+pY9dMZYySHsE75ouzScb3Vt1FrqaDRk+mqTCSIxqTGRM9fjpXaXc4
k+KQ57f8/pNsRFvbjz7ev4sD4LyEQ+nCOFCa9Lc03zc6J/Jj1+nDqPzwznzil1by
eLRyTwg7TERcqDGg+wIDAQAB
-----END PUBLIC KEY-----

Input the consumer info and public key for authentication.
- Click Continue. Jira should finish configuring the application link then display the message:
Application Link 'Rollbar' created successfully.
In Rollbar
- Go to Projects.
- Click on the "+" under Integrations for your project
- Select the Jira channel
- If no users in the account have configured a Jira credential, then you will need to enter the URL of your Jira server to set up a default credential for the project. Otherwise, you can select from the available credentials in the account.
- If you wish to set up an additional Jira credential for use as the project default, then go to User Settings → Connected Accounts → Jira to complete the configuration.
- Select a
Jira ProjectandIssue Typefor the linked issues created for the Rollbar Project - By default, each Rollbar user must have a credential configured in order to use the Create Issue button in the item view. If you would like for project members to be able to use the default project credential rather than entering their own, then check
Use default credentials if user has not connected to Jira. - Click Send Test Notification to verify that issues can be created in your Jira project.
- Click Enable to turn on the integration.
NOTE: You must follow the steps below in "Rollbar for Jira" for the status changes to flow in both directions - without Rollbar for Jira, status changes will flow from Rollbar to Jira but not in reverse.
View Rollbar info in Jira
NOTE: This feature is only available in Jira Cloud, not in self-hosted Jira versions
By adding the Rollbar for Jira add-on to your Jira Cloud instance, you can view Rollbar error data in the corresponding Jira issues.
The data appears in the right column in a section entitled 'Rollbar Linked Items' and includes:
- Occurrences and deployments in the past 24 hours
- Error status
- Number of total occurrences
- Number of unique IPs affected
- Datetime first seen
- Datetime last seen
To install the Rollbar for Jira add-on within your Jira account:
- Go to Jira Administration → Add-ons
- Enter "Rollbar" in the search field
- Click on "Install" on the Rollbar for Jira add-on
To install Rollbar for JIRA from the Atlassian Marketplace:
- Go to https://marketplace.atlassian.com/plugins/com.rollbar.jira/cloud/overview
- Click 'Get it Now'
If you've already set up your Rollbar account to create issues in Jira per the instructions above,
you will automatically start seeing Rollbar Linked Item data in your linked Jira issues.
Updated about 1 year ago